


I-3
Index
I
O
OK button, 2-15
One-Touch Speed Dial buttons, 2-15
One-Touch Speed Dial List, 12-7
One-Touch Speed Dial panel, 2-15
One-Touch Speed Dialing, 5-1, 6-7
changing or deleting numbers, 5-3
storing numbers, 5-2
using, 5-4
Operation panel, 2-11, 2-12, 2-14
Orientation, 4-11
Output tray, 2-11, 2-12
P
Paper cassette
installing, 2-6
Paper jam
clearing, 13-1
Paper output area
face down, 4-13
face up, 4-13
guidelines, 4-12
selecting, 4-12
PAPER SETTINGS, 15-2
PBX, 9-1
Polling
receiving, 8-2
sending, 8-3
Polling box
changing settings, 8-5
deleting, 8-6
scanning document into the memory, 8-4
setting up, 8-3
Polling button, 2-15
Power Cord, 2-2
connecting, 2-8
Power socket, 2-13
Preset copy ratio, 10-4
PRINT LISTS, 15-16
PRINT STATUS, 11-1
Printer cover, 2-11, 2-12
PRINTER DATA ERROR message, 13-9
Printer driver, 1-4
PRINTER SETTINGS, 15-14
R
R button, 2-15
Rear cover, 2-13
Rear view, 2-13
REC. PAPER JAM message, 7-6, 13-9
Receive mode
AnsMode, 7-1
FaxOnly, 7-1
FaxTel, 7-1
Manual, 7-1
setting, 7-2
Receive Mode button, 2-15
RECEIVED IN MEMORY message, 13-9
Recording paper
loading in the cassette, 2-22, 4-3
loading in the multi-purpose feeder, 4-8
printing areas, 4-2
requirements, 4-1
Redial/Pause button, 2-15
Redialing
automatically, 6-11
canceling, 6-11
manually, 6-11
setting up, 6-11
Regular Dialing, 6-7
REMOVE MP PAPER message, 13-9
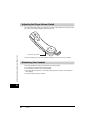
Removing Jammed Paper from the ADF, 13-7
REPLACE CARTRIDGE message, 13-9
Report button, 2-15
REPORT STATUS, 11-1
Reserve copy, 10-9
Restriction
canceling, 9-5
enabling, 9-4
RING START TIME, 7-2
Ringer Volume Switch, B-4
RX Report, 12-4