


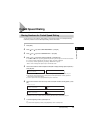
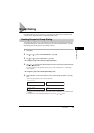

Coded Speed Dialing
5-7
Speed Dialing
5
6
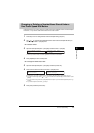
Press the numeric buttons to enter the new name ➞ press [OK].
For details on how to enter or delete letters, see “Entering Numbers, Letters, and Symbols,” on p. 3-1.
7
To change additional numbers and/or names, repeat steps 2 to 6.
-or-
If you have finished changing numbers and/or names, press [Stop/Reset] to return to standby mode.
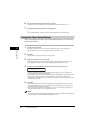
Using Coded Speed Dialing
Once you have registered your numbers under Coded Speed Dialing codes, you can send documents
as follows:
1
Load the document in the ADF.
For details on the types of documents you can fax, their requirements, and how to load documents, see
“Document Requirements,” on p. 6-1, and “Loading Documents in the ADF,” on p.6-3.
2
Press [FAX].
If you are already in the Fax standby mode, you can skip this step.
3
Adjust any necessary settings for your document.
• Press [Image Quality] to select the fax resolution. (See “Adjusting the Image Quality (Resolution),” on p. 6-4.)
• Press [Exposure] to select the scan density. (See “Adjusting the Exposure (Density),” on p. 6-5.)
4
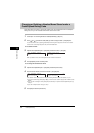
Press [Coded Dial] ➞ use the numeric buttons to enter the two-digit code* assigned to the number to
which you wish to fax.
*Enter a three-digit code for the FAX-L390 model.
• The name registered under that Coded Speed Dialing code is displayed. If no name is registered, the number
registered under that code will be displayed.
• If you mistakenly enter the wrong code, press [Stop/Reset] ➞ [Coded Dial] ➞ enter the correct code.
• If no fax number is assigned to the Coded Speed Dialing code you press, the LCD displays <NOT
REGISTERED>. If this happens, make sure you enter the correct code and that the number you want to dial is
registered under that code.
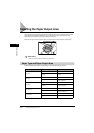
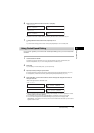
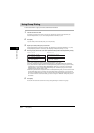
CODED SPD DIAL
03=
CODED SPD DIAL
003=
➞
➞
:A
Canon ITALIA
FAX-L380S
FAX-L390
:A
Canon ITALIA
TEL= 456xxxx
04 Canon CANADA
➞
➞
TEL=
TEL=
FAX-L380S
FAX-L390
TEL= 456xxxx
004 Canon CANADA