


Delayed Sending
6-15
Sending Faxes
6
Delayed Sending
Your machine allows you to scan a document into its memory and send it automatically at a preset
time. By using this feature, you can take advantage of lower long distance rates at night, for example.
You can set up to 142 destinations (210 destinations for the FAX-L390 model) and up to 20
reservations for delayed sending.
1
Load the document in the ADF.
For details on the types of documents you can fax, their requirements, and how to load documents, see
“Document Requirements,” on p. 6-1, and “Loading Documents in the ADF,” on p.6-3.
2
Press [FAX].
If you are already in the Fax standby mode, you can skip this step.
3
Adjust any necessary settings for your document.
• Press [Image Quality] to select the fax resolution. (See “Adjusting the Image Quality (Resolution),” on p. 6-4.)
• Press [Exposure] to select the scan density. (See “Adjusting the Exposure (Density),” on p. 6-5.)
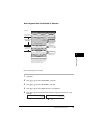
4
Open One-Touch Speed Dial panel ➞ press [Delayed Transmission].
5
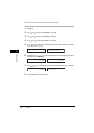
Use the numeric buttons to enter the time at which you want to send the document ➞ press [OK].
Enter the time using the 24-hour clock system. Precede single digits with a zero.
Example:
9:30 a.m. = 09:30
4:30 p.m. = 16:30
TEL=
➞
DELAYED TX
TX TIME SETTNG 10:00