


Section 7 COPIER MANAGEMENT
7-104
Slight changes in color copying may take place if your color copier
is used over a long period of time. If the color of the originals and
that which appears on the copies begins to differ greatly, use this
procedure to adjust the color.
1
With the content of the “Basic” tab displayed, press the
[Default Setting/Counter] key.
The “Default setting” screen will be displayed.
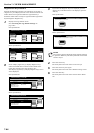
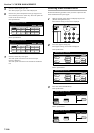
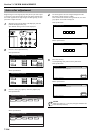
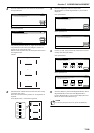
2
Press the “User adjustment” key.
Inch specifications
Metric specifications
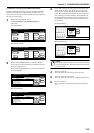
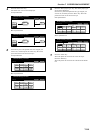
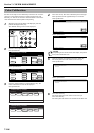
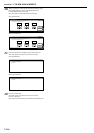
3
Press the “Auto gray adjust” [“Auto Gray Adjust”] key.
Inch specifications
Metric specifications
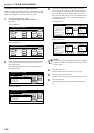
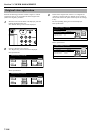
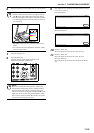
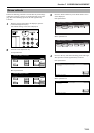
4
Use the keypad to enter the 4-digit management code.
The factory default setting is “2600”.
If the entered code matches the registered one, the “Auto
gray adjust” screen will be displayed.
Inch specifications
Metric specifications
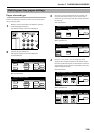
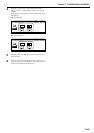
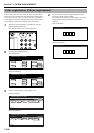
5
Press the “On” key.
A corresponding color pattern will be printed out.
Inch specifications
Metric specifications
NOTE
Make sure there 11" × 8 1/2" [A4] size paper loaded in one
of the drawers[cassettes].
Auto color adjustment
End
Default setting / Counter
Default setting
Copy
default
Machine
default
Counter
check
User
Adjustment
Language
Bypass
setting
Register
orig. size
Management
Print
report
End
Default setting/ Counter
Default setting
Copy
default
Machine
default
Counter
check
User
Adjustment
Language
Bypass
setting
Register
orig. size
Management
Print
report
Default setting / Counter
Close
User adjustment
Default setting
Auto gray
adjust
Drum
refresh
Color
Calibrat
B&W Densit
Adjustment
Color
Regist.
Default setting / Counter
Close
User adjustment
Default setting
Auto Grey
Adjust
Drum
refresh
Color
Calibrat
B&W Densit
Adjustment
Colour
Regist.
Close
Enter the administrator number.
Close
Enter the administrator number.
Close
Default setting - User adjustment
Output 3 color pattern to adjust the image quality
Auto gray adjust
On
Close
Default setting - User adjustment
Auto Grey Adjust
On
Output 3 colour pattern to adjust the image quality