


Epson STYLUS NX100/NX105/SX100/SX105/TX100/TX101/TX102/TX103/TX105/TX106/TX109/ME 300 Revision A
DISASSEMBLY/ASSEMBLY Disassembling the Printer Mechanism 69
Confidential
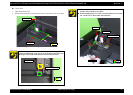
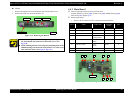
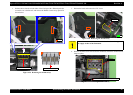
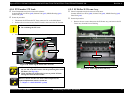
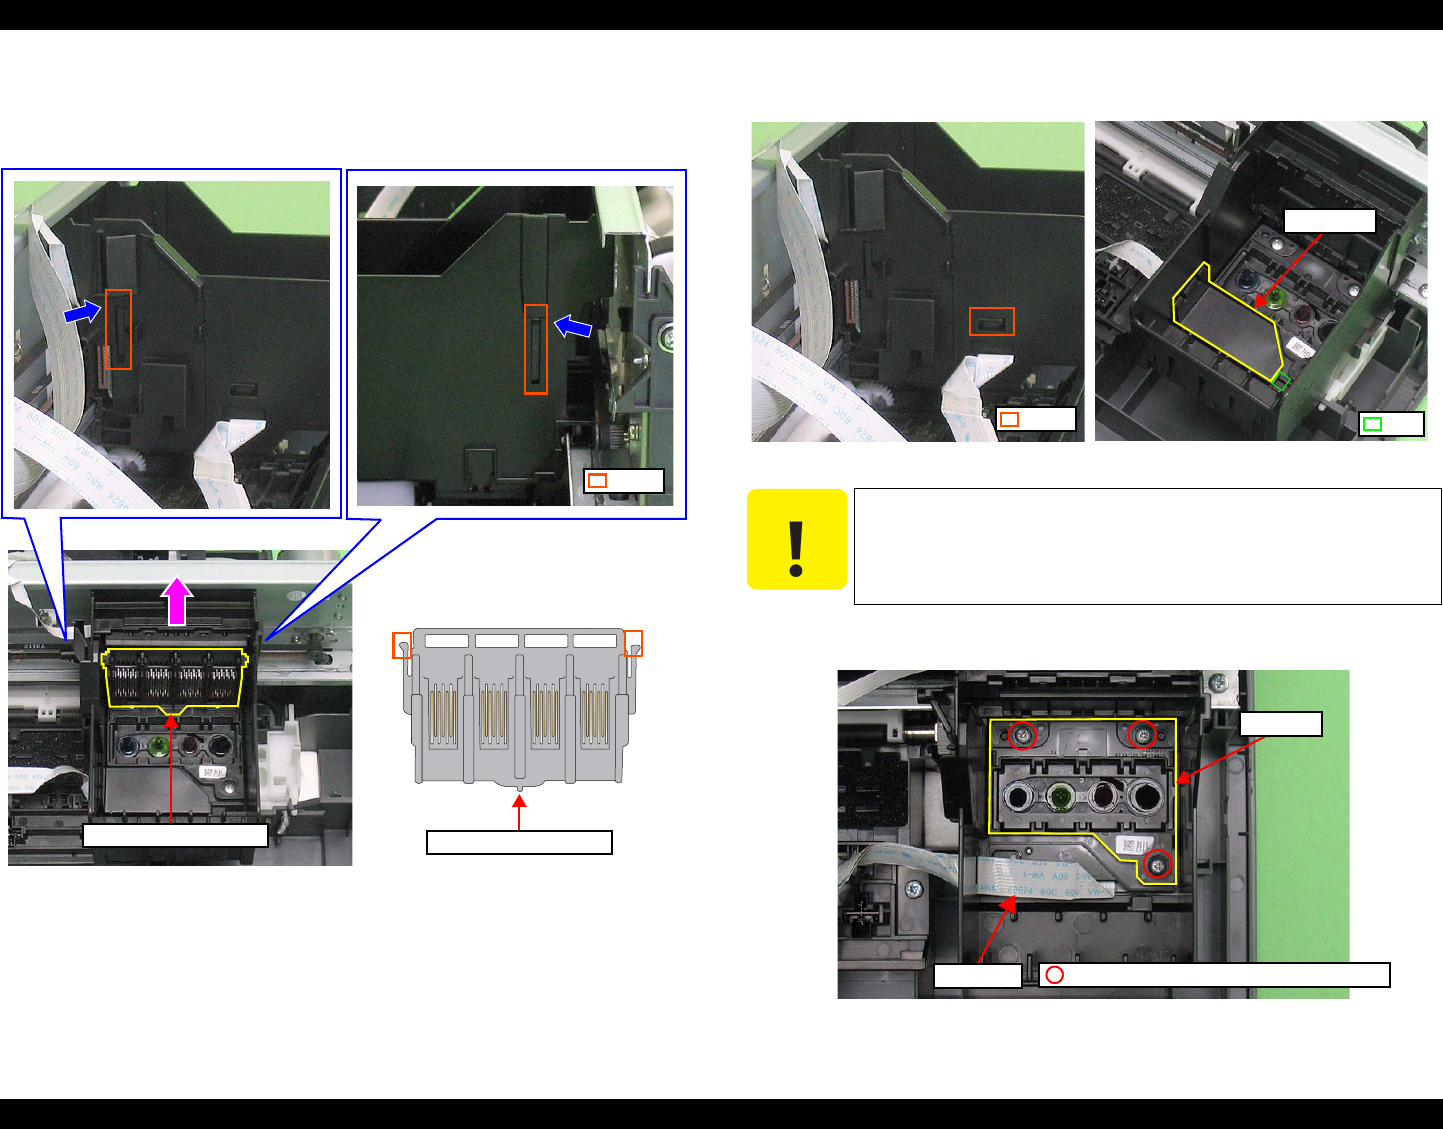
4. Release the two hooks on both sides of the Carriage with a flathead precision
screwdriver or a similar tool, and remove the Holder Contact Assy upward as
shown below.
Figure 4-29. Removing the Printhead (4)
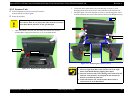
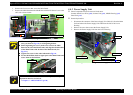
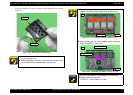
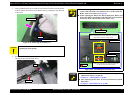
5. Release the hook, and remove the FFC Cover.
Figure 4-30. Removing the Printhead (5)
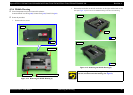
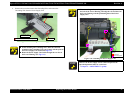
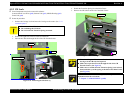
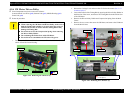
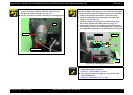
6. Remove the three screws that secure the Printhead, and lift the Printhead with
longnose pliers.
Figure 4-31. Removing the Printhead (6)
Holder Contact Assy
Holder Contact Assy
Hook
C A U T I O N
Be careful not to touch the nozzles with bare hands or damage the
ink supply needles of the Printhead.
FFC Cover
Rib
hook
SCREW P-TIGHT M2.6x8 BIND (4±0.25kgfcm)
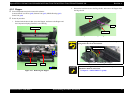
Printhead
Head FFC