


Epson STYLUS NX100/NX105/SX100/SX105/TX100/TX101/TX102/TX103/TX105/TX106/TX109/ME 300 Revision A
DISASSEMBLY/ASSEMBLY Disassembling the Printer Mechanism 94
Confidential
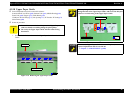
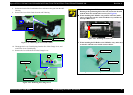
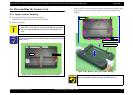
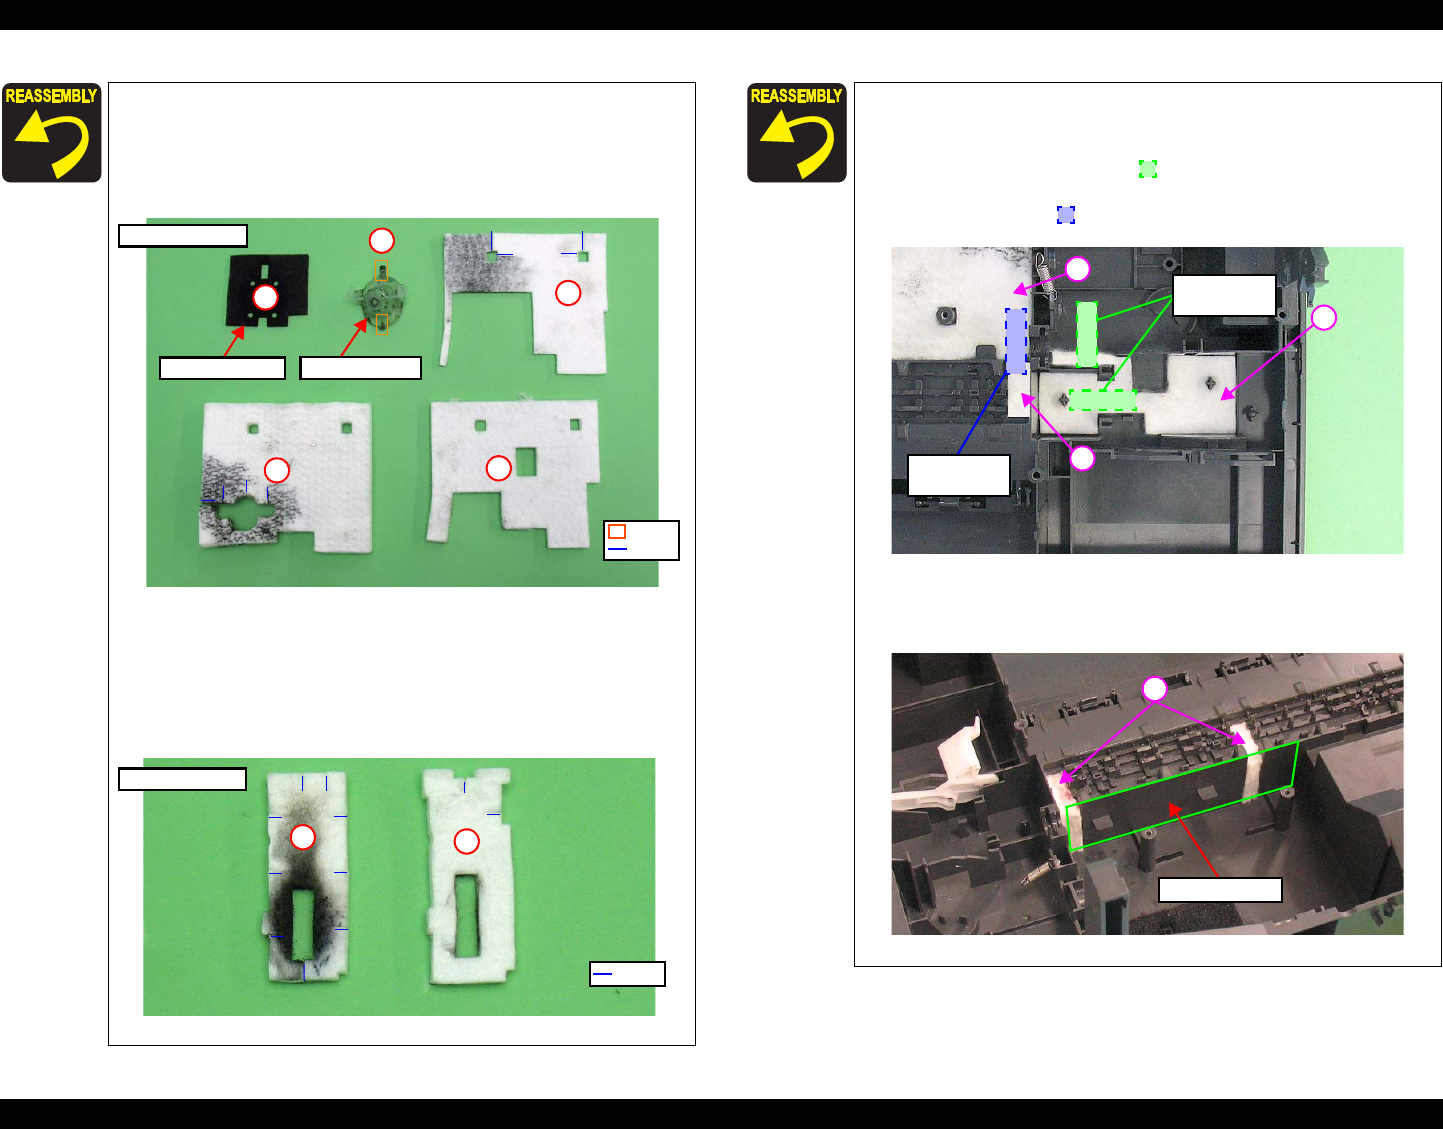
When installing the Waste Ink Pads, align the ribs of the Lower
Housing with the notches of the Waste Ink Pads. (See
Fig.4-99.)
When installing the Diffusion Sheet in the section B, install the
Waste Ink Cover and the Waste Ink Pads (x3) in the order
shown below.
Figure 4-100. Installing the Waste Ink Pads (1)
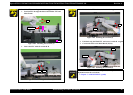
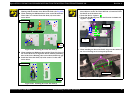
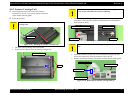
When installing the Diffusion sheet and the Waste Ink Cover in
the section B, be sure to align their dowels with the positioning
holes of the Lower Housing, then secure them without any gap.
Install the Waste Ink Pads (x2) in the section C in the order
shown below.
Figure 4-101. Installing the Waste Ink Pads (2)
Diffusion Sheet
Duct Tube End
Parts in section B
1
2
4
5
3
Notch
Dowel
1
2
Notch
Parts in section C
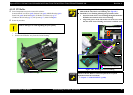
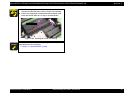
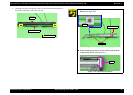
Put double-sided tape (8mm x 30mm) on the Lower Housing as
shown below to secure the Waste Ink Pad A, B and the Waste
Ink Pad E on the 0-column side.
• Waste Ink Pad A: 2 points ( )
• Waste Ink Pad B and Waste Ink Pad E on the 0-column side
together: 1 point (
)
Figure 4-102. Installing the Waste Ink Pads (3)
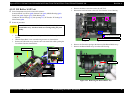
When installing the Waste Ink Pad E, align it to the surface of
the Lower Housing not to let the pads protrude.
Figure 4-103. Installing the Waste Ink Pads (4)
A
B
Double-sided
Tape
E
Double-sided
Tape
E
Lower Housing