


Epson STYLUS NX100/NX105/SX100/SX105/TX100/TX101/TX102/TX103/TX105/TX106/TX109/ME 300 Revision A
DISASSEMBLY/ASSEMBLY Disassembling the Printer Mechanism 73
Confidential
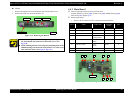
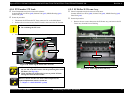
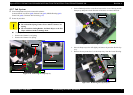
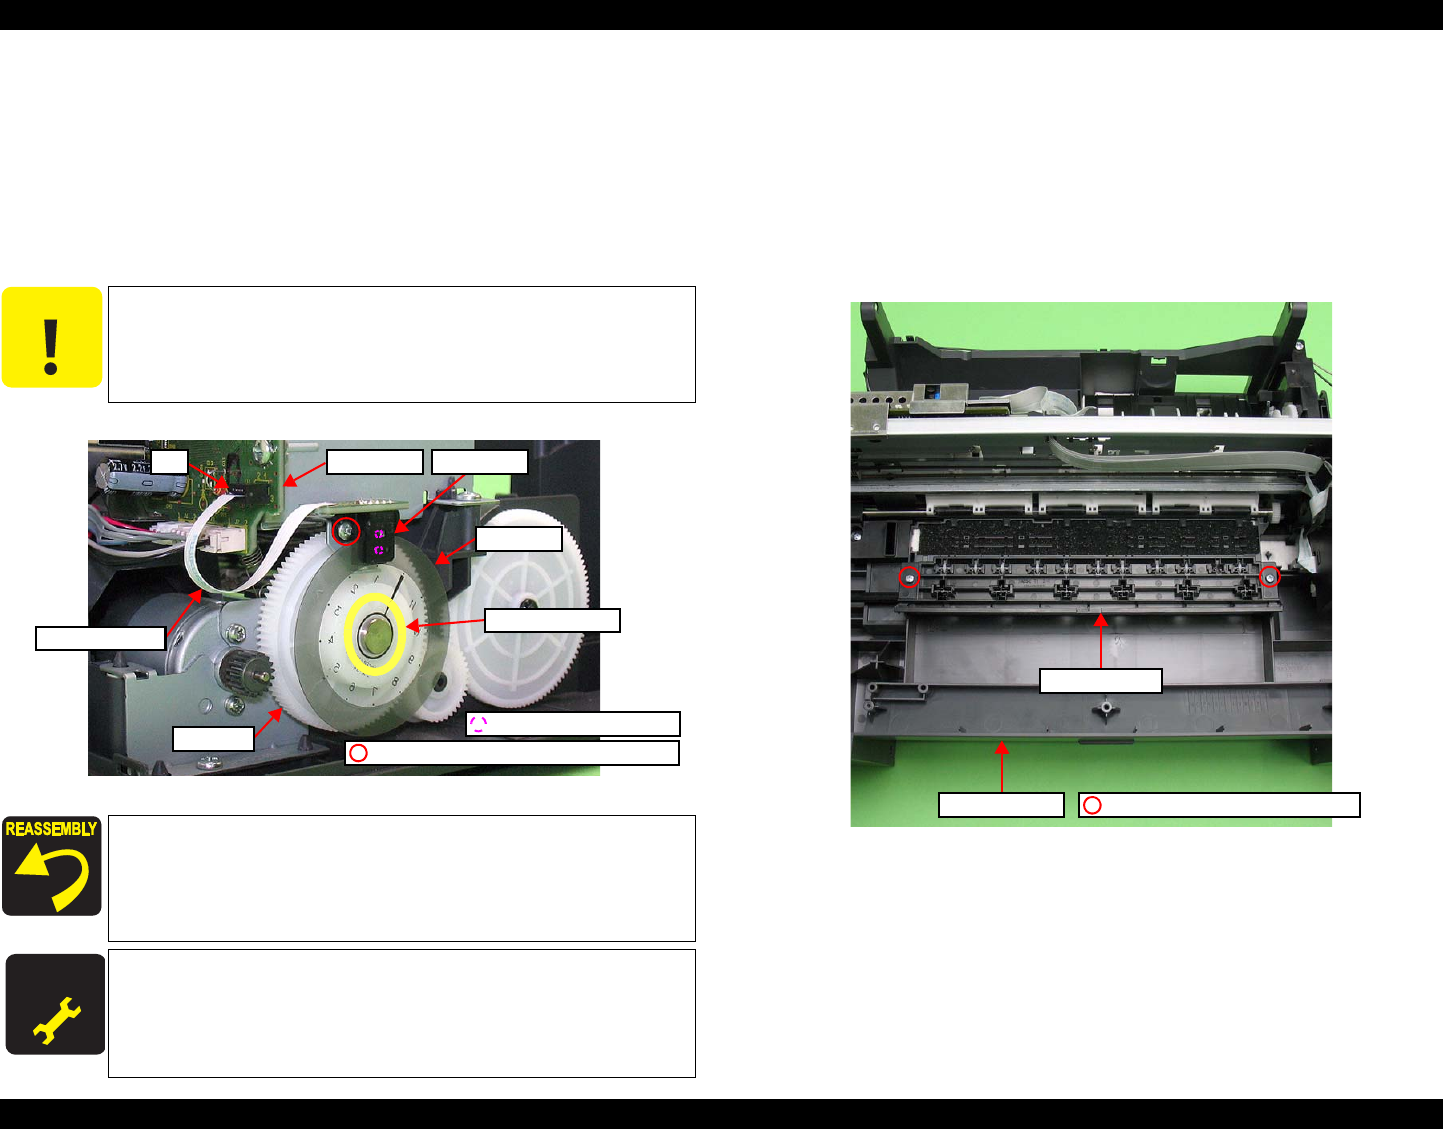
4.5.4 PF Encoder/ PF Scale
Parts/Components need to be removed in advance:
Scanner Stand/Cover Wire (p 60), Scanner Unit (p 62), Middle Housing (p 63)
Panel Unit (p 64)
Removal procedure
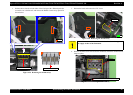
1. Disconnect the PF Encoder FFC from connector J11 on the Main Board.
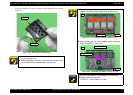
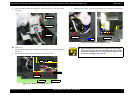
2. Remove the screw that secures the PF Encoder, and remove the PF Encoder.
3. Peel off the PF Scale secured with the double-sided tape from the Spur Gear.
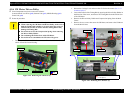
Figure 4-40. Removing the PF Encoder/ PF Scale
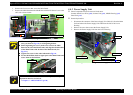
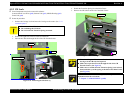
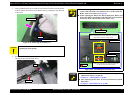
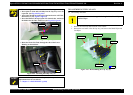
4.5.5 EJ Roller/ EJ Frame Assy
Parts/Components need to be removed in advance:
Scanner Stand/Cover Wire (p 60), Scanner Unit (p 62), Middle Housing (p 63)
Panel Unit (p 64)
Removal procedure
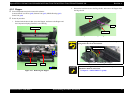
1. Remove the two screws that secure the EJ Frame Assy, and remove the EJ
Frame Assy from the Lower Housing.
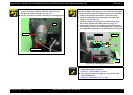
Figure 4-41. Removing the EJ Frame Assy
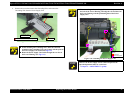
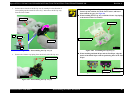
C A U T I O N
Do not touch the PF Scale with bare hands.
Do not damage the PF Scale.
When installing the PF Encoder, be sure to align the dowels in
the rear side of the PF Encoder with the positioning holes of the
PF Motor. (See
Fig.4-40.)
When installing the PF Encoder, be sure to put the PF Scale
through the slit of the PF Encoder.
A D J U S T M E N T
R E Q U IR E D
Whenever the PF Encoder/ PF Scale removed/replaced, the
required adjustments must be carried out.
• Chapter 5 “ ADJUSTMENT” (p.100)
Positioning Hole and Dowel
PF Encoder
PF Scale
PF Encoder FFC
Spur Gear
J11
Main Board
Double-sided Tape
M2x5 S-TIGHT BIND HEAD (3±0.25kgfcm)
EJ Frame Assy
Lower Housing
SCREW M3x8 P-TITE (5±0.5kgfcm)