


Epson STYLUS NX100/NX105/SX100/SX105/TX100/TX101/TX102/TX103/TX105/TX106/TX109/ME 300 Revision A
DISASSEMBLY/ASSEMBLY Disassembling the Printer Mechanism 93
Confidential
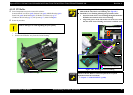
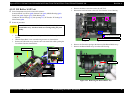
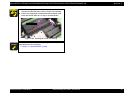
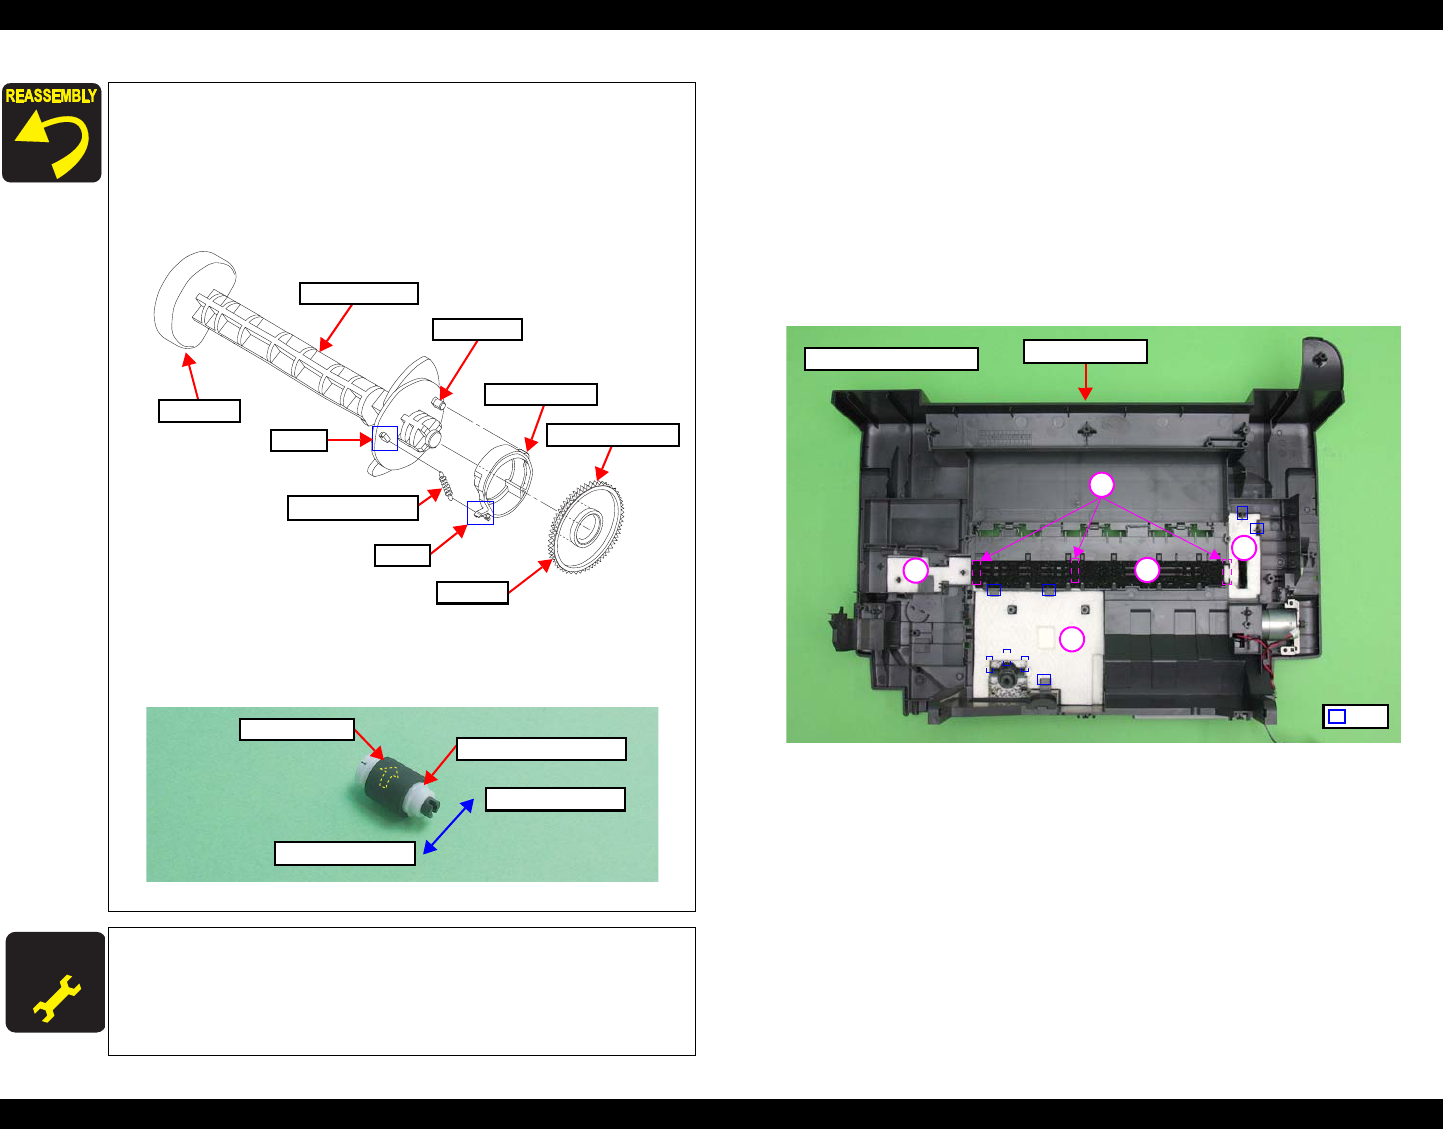
4.5.14 Waste Ink Pads
Parts/Components need to be removed in advance:
Scanner Stand/Cover Wire(p 60), Scanner Unit (p 62), Middle Housing (p 63)
Panel Unit (p 64), Main Board (p 65), EJ Roller/ EJ Frame Assy (p 73)
CR Motor/ Driven Pulley (p 75), Ink System (p 77), Main Frame (p 84)
PF Roller (p 90), LD Roller/ ASF Unit (p 91)
Removal procedure
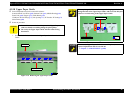
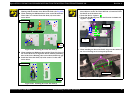
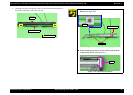
1. Remove the Waste Ink Pads (A - F) from the Lower Housing.
Figure 4-99. Removing the Waste Ink Pads
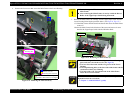
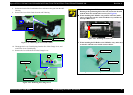
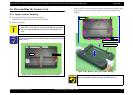
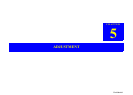
Assemble the LD Roller Assy following the procedure below.
1. Install the Clutch while aligning the guide pin of the LD
Roller Shaft with the hole of the Clutch.
2. Install the Extension Spring between the hook of the LD
Roller Shaft and that of the Clutch.
3. Install the Combination Gear to the LD Roller Shaft.
Figure 4-97. Assembling the LD Roller Assy (2)
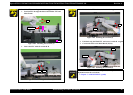
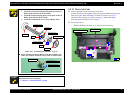
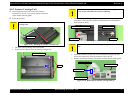
When installing the Retard Roller to the Retard Roller Assy,
make sure to attach it with the arrow inside as shown below.
Figure 4-98. Assembling the Retard Roller Assy
A D J U S T M E N T
R E Q U IR E D
Whenever the ASF Unit is removed/replaced, the required
adjustments must be carried out.
• Chapter 5 “ ADJUSTMENT” (p.100)
LD Roller Shaft
Guide pin
Extension Spring
Clutch
Hook
Hook
LD Roller
Positioning hole
Combination Gear
Retard Roller
Retard Roller Assy
Feeding paper side
Ejecting paper side
Waste Ink Pads (A-F)
Rib
A
B
C
D
Lower Housing
E