


Epson STYLUS NX100/NX105/SX100/SX105/TX100/TX101/TX102/TX103/TX105/TX106/TX109/ME 300 Revision A
DISASSEMBLY/ASSEMBLY Disassembling the Scanner Unit 97
Confidential
4.6.2 Scanner Carriage Unit
Parts/Components need to be removed in advance:
Document Cover/ASF Cover (p 59), Scanner Unit (p 62)
Upper Scanner Housing (p 96)
Removal procedure
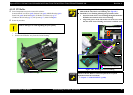
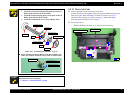
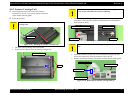
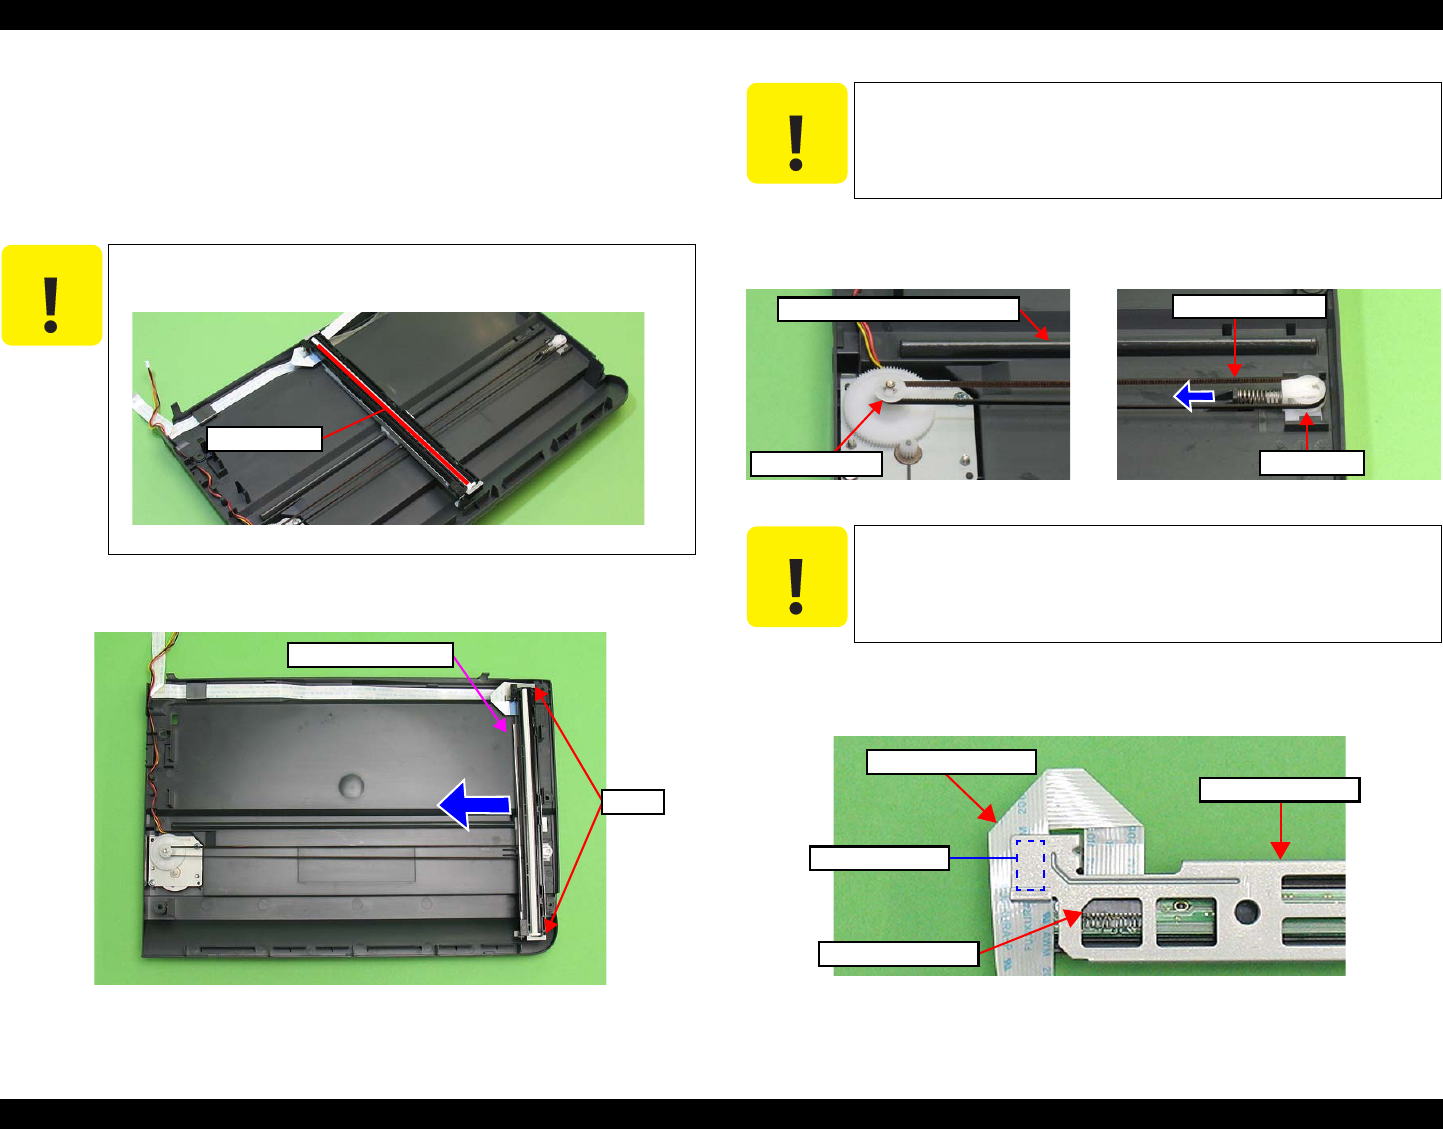
1. Move the Scanner Carriage Unit to the center.
2. Remove the two Spacers from the Scanner Carriage Unit.
Figure 4-108. Moving the Scanner Carriage Unit
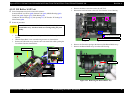
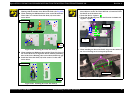
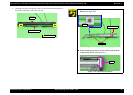
3. Loosen the Scanner Timing Belt by pressing the Driven Pulley in the direction
of the arrow, and remove the Scanner Timing Belt from the Combination
Gear and Driven Pulley.
Figure 4-109. Removing the Scanner Carriage Unit (1)
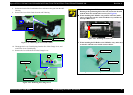
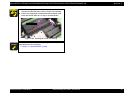
4. Peel off the Scanner Carriage FFC from the Scanner Carriage Unit, and
remove the Scanner FFC from the connector of the CIS Unit.
5. Remove the Scanner Carriage Unit together with the Scanner Timing Belt.
Figure 4-110. Removing the Scanner Carriage Unit (2)
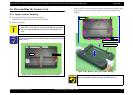
C A U T I O N
Do not scratch the Rod Lens Array when removing the Scanner
Carriage Unit.
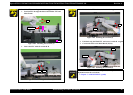
Figure 4-107. Handling the Scanner Carriage Unit
Rod Lens Array
Scanner Carriage Unit
Spacers
C A U T I O N
Take extra care not to contaminate the Scanner Timing Belt with
grease on the rail of the Lower Scanner Housing.
C A U T I O N
Be careful about the double-sided tape fixing the Scanner Carriage
FFC.
Scanner Timing Belt
Driven Pulley
Rail of the Lower Scanner Housing
Combination Gear
Double-sided Tape
Scanner Carriage FFC
Scanner Carriage Unit
Connector of CIS Unit