


Epson STYLUS NX100/NX105/SX100/SX105/TX100/TX101/TX102/TX103/TX105/TX106/TX109/ME 300 Revision A
DISASSEMBLY/ASSEMBLY Disassembling the Printer Mechanism 74
Confidential
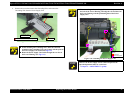
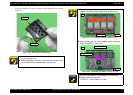
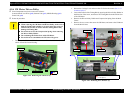
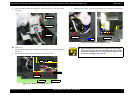
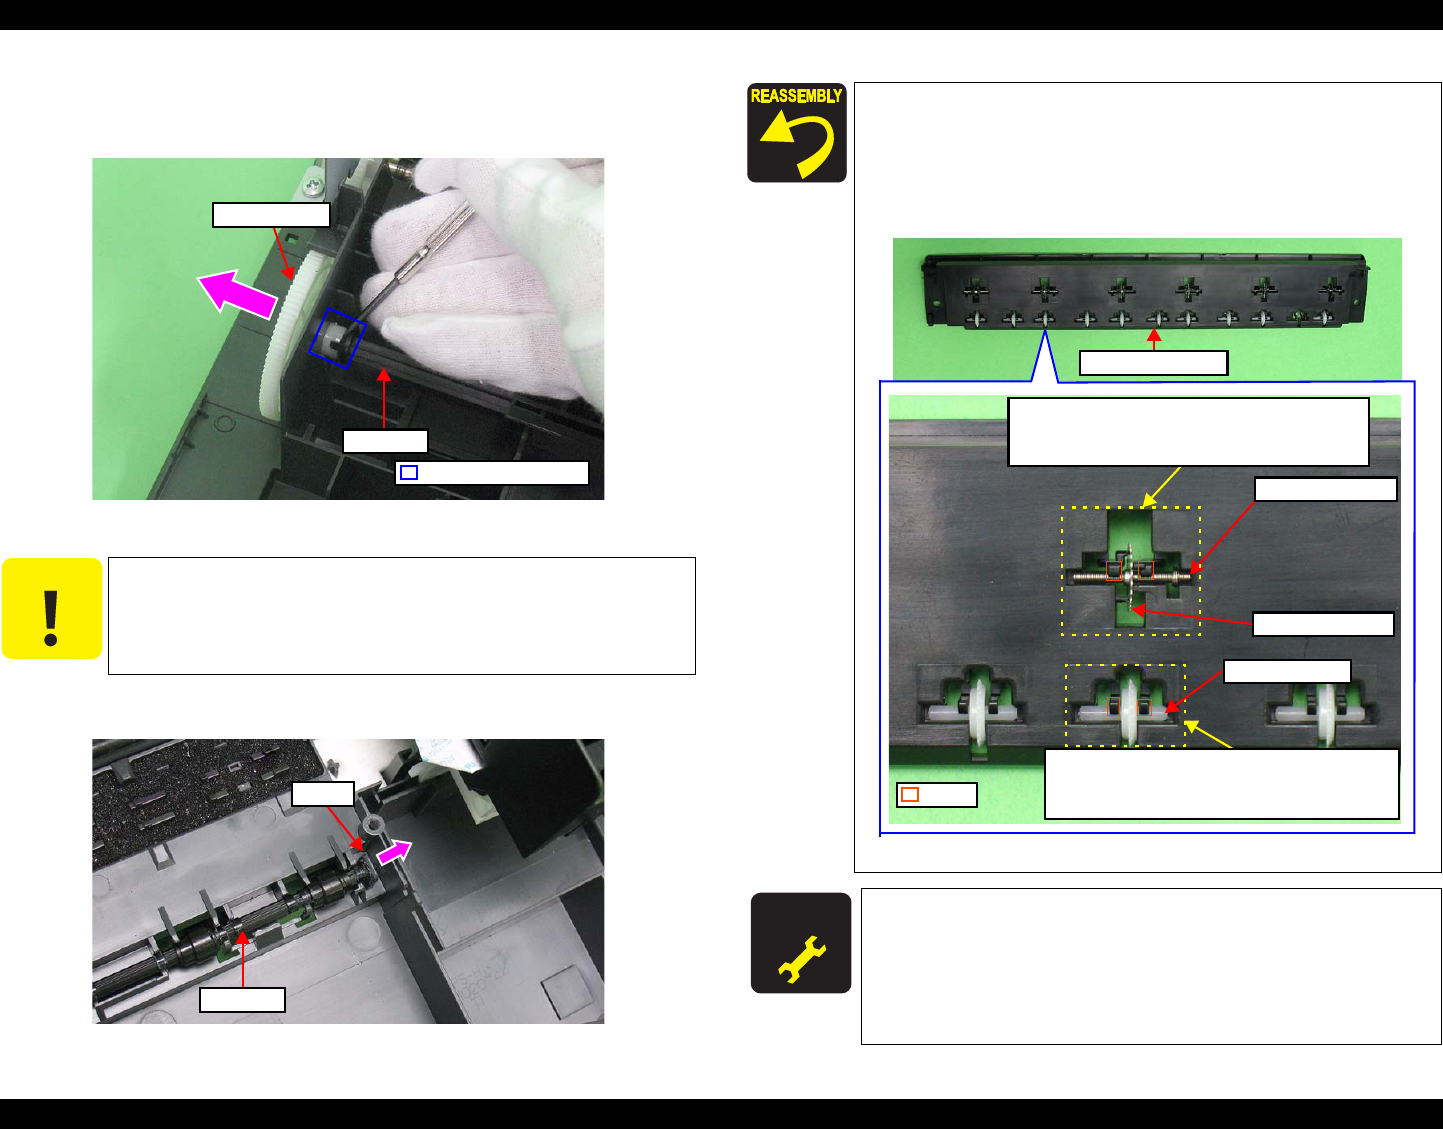
2. Insert a flathead precision screwdriver between the EJ Roller Gear and the rib
of the EJ Roller, and remove the EJ Roller Gear by pushing it in the direction
of the arrow.
Figure 4-42. Removing the EJ Roller (1)
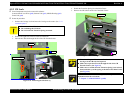
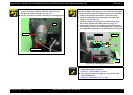
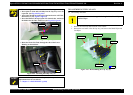
3. Remove the EJ Roller by pushing the bearing on the right side of the Lower
Housing in the direction of the arrow.
Figure 4-43. Removing the EJ Roller (2)
C A U T I O N
Be careful not to touch the rubber part of the EJ Roller to avoid
degrading the print quality.
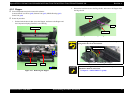
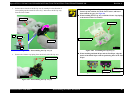
EJ Roller
EJ Roller Gear
Concave-convex section
EJ Roller
Bearing
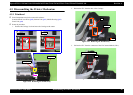
When installing the EJ Roller Gear, be sure to align the concave
section of the EJ Roller Gear with the convex section of the EJ
Roller, then secure them. (See
Fig.4-42.)
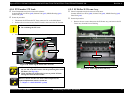
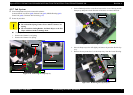
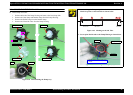
When replacing the Wheel Star Metal, Spring Star Wheel, and
Wheel Star EXIT, install them in the direction as shown below,
and secure them with the hooks of EJ Frame Assy.
Figure 4-44. Assembling the EJ Frame Assy
A D J U S T M E N T
R E Q U IR E D
Whenever the EJ Roller is removed/replaced, the required
adjustments must be carried out.
• Chapter 5 “ ADJUSTMENT” (p.100)
After replacing the EJ roller, be sure to perform the required
lubrication.
• Chapter 6 “ MAINTENANCE” (p.108)
Wheel Star Metal
Hook
Wheel Star EXIT
Spring Star Wheel
Align the sides of the Wheel Star EXIT with the
dents of the EJ Frame Assy as shown, and secure
the Wheel Star EXIT with the hooks.
EJ Frame Assy
Put the Spring Star Wheel through the Wheel Star
Metal, and align them with the dents of the EJ Frame
Assy, then secure them with the hooks.