


Epson STYLUS NX100/NX105/SX100/SX105/TX100/TX101/TX102/TX103/TX105/TX106/TX109/ME 300 Revision A
DISASSEMBLY/ASSEMBLY Disassembling the Printer Mechanism 92
Confidential
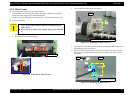
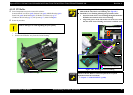
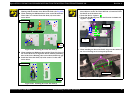
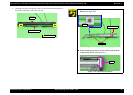
8. Release the hook of the Combination Gear, and remove the gear from the ASF
Housing.
9. Remove the Lever Pick Clutch from the ASF Housing.
Figure 4-93. Removing the Lever Pick Clutch
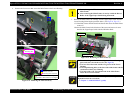
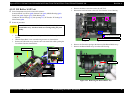
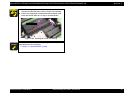
10. Disengage the Lever Clutch Spring from the ribs of the Change Lever, and
remove the Lever Clutch Spring.
11. Remove the Lever Idle Gear from the Change Lever.
Figure 4-94. Removing the Change Lever
Hook
Combination Gear
Lever Pick Clutch
ASF Housing
Change Lever
RearRibs
Lever Idle Gear
Lever Clutch Spring
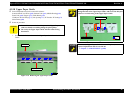
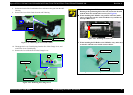
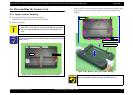
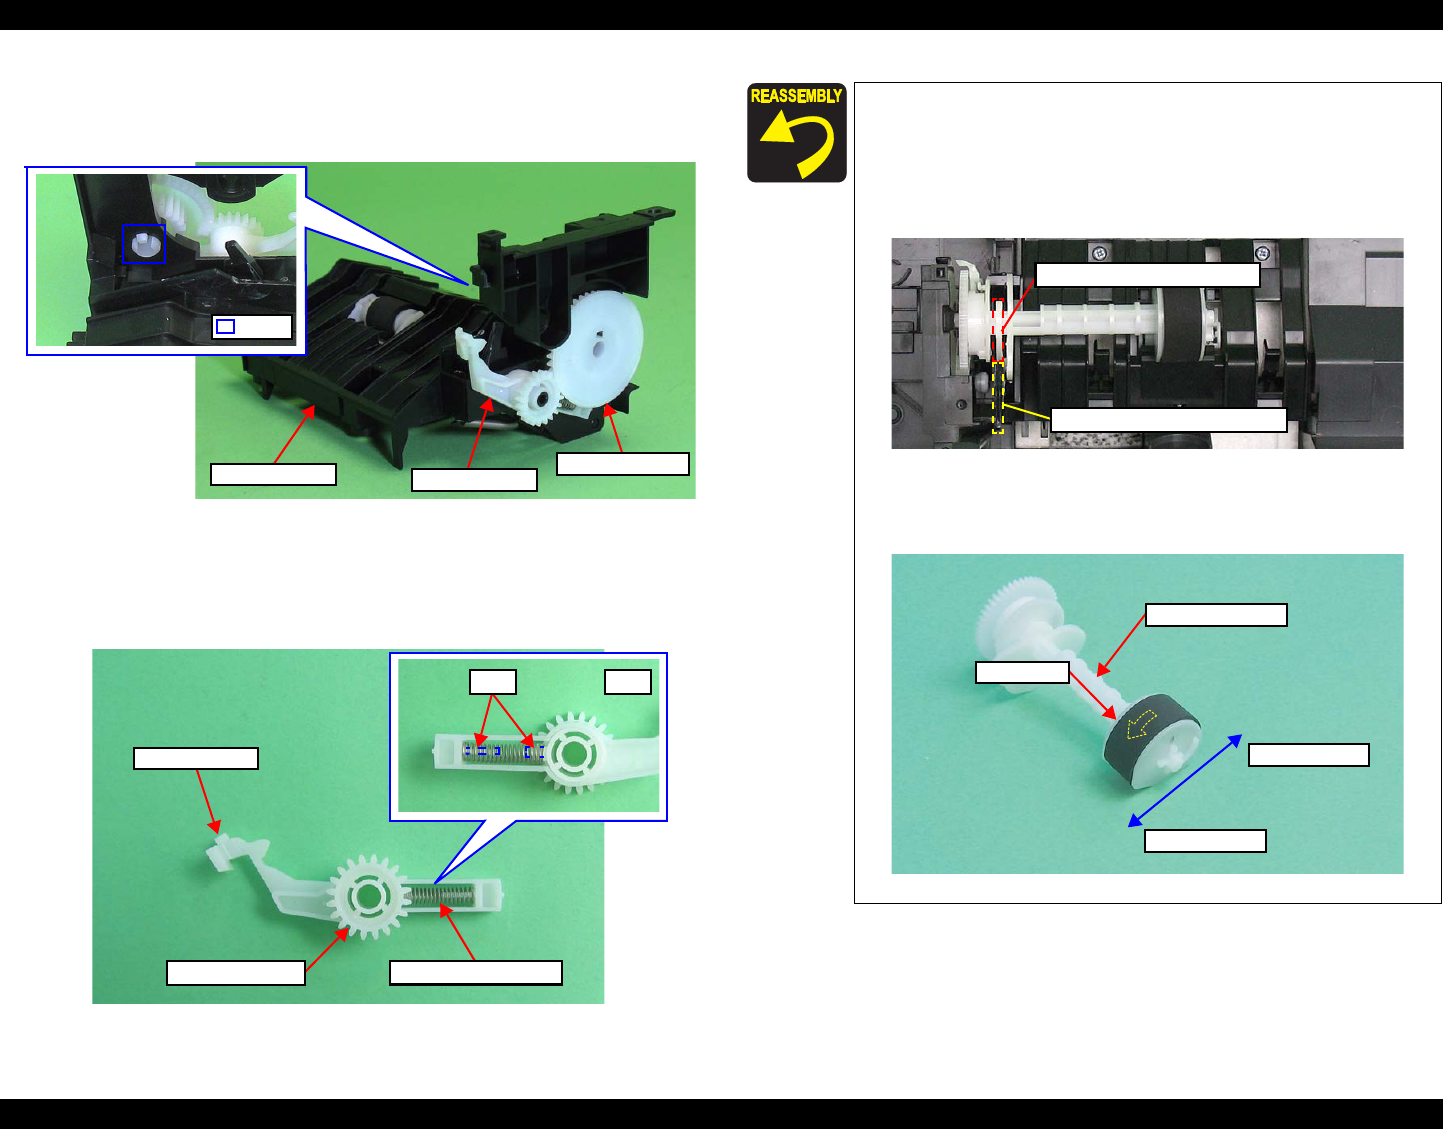
When installing the ASF Unit, insert the guide pin of the Lower
Housing to the positioning hole of the unit, and secure the unit
with the hook of it and the three screws. (See
Fig.4-91.)
When installing the LD Roller Assy and the ASF Unit, make
sure to engage the cam face of the LD Roller Assy and that of
the Paper Back Lever.
Figure 4-95. Installing the ASF Unit
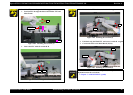
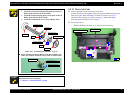
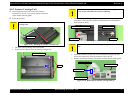
When installing the LD Roller to the LD Roller Assy, make sure
to attach it with the arrow inside as shown below.
Figure 4-96. Assembling the LD Roller Assy (1)
Cam Face of the Paper Back Lever
Cam Face of the LD Roller Assy
LD Roller
LD Roller Assy
Paper eject side
Paper feed side