


Epson STYLUS NX100/NX105/SX100/SX105/TX100/TX101/TX102/TX103/TX105/TX106/TX109/ME 300 Revision A
DISASSEMBLY/ASSEMBLY Disassembling the Printer Mechanism 75
Confidential
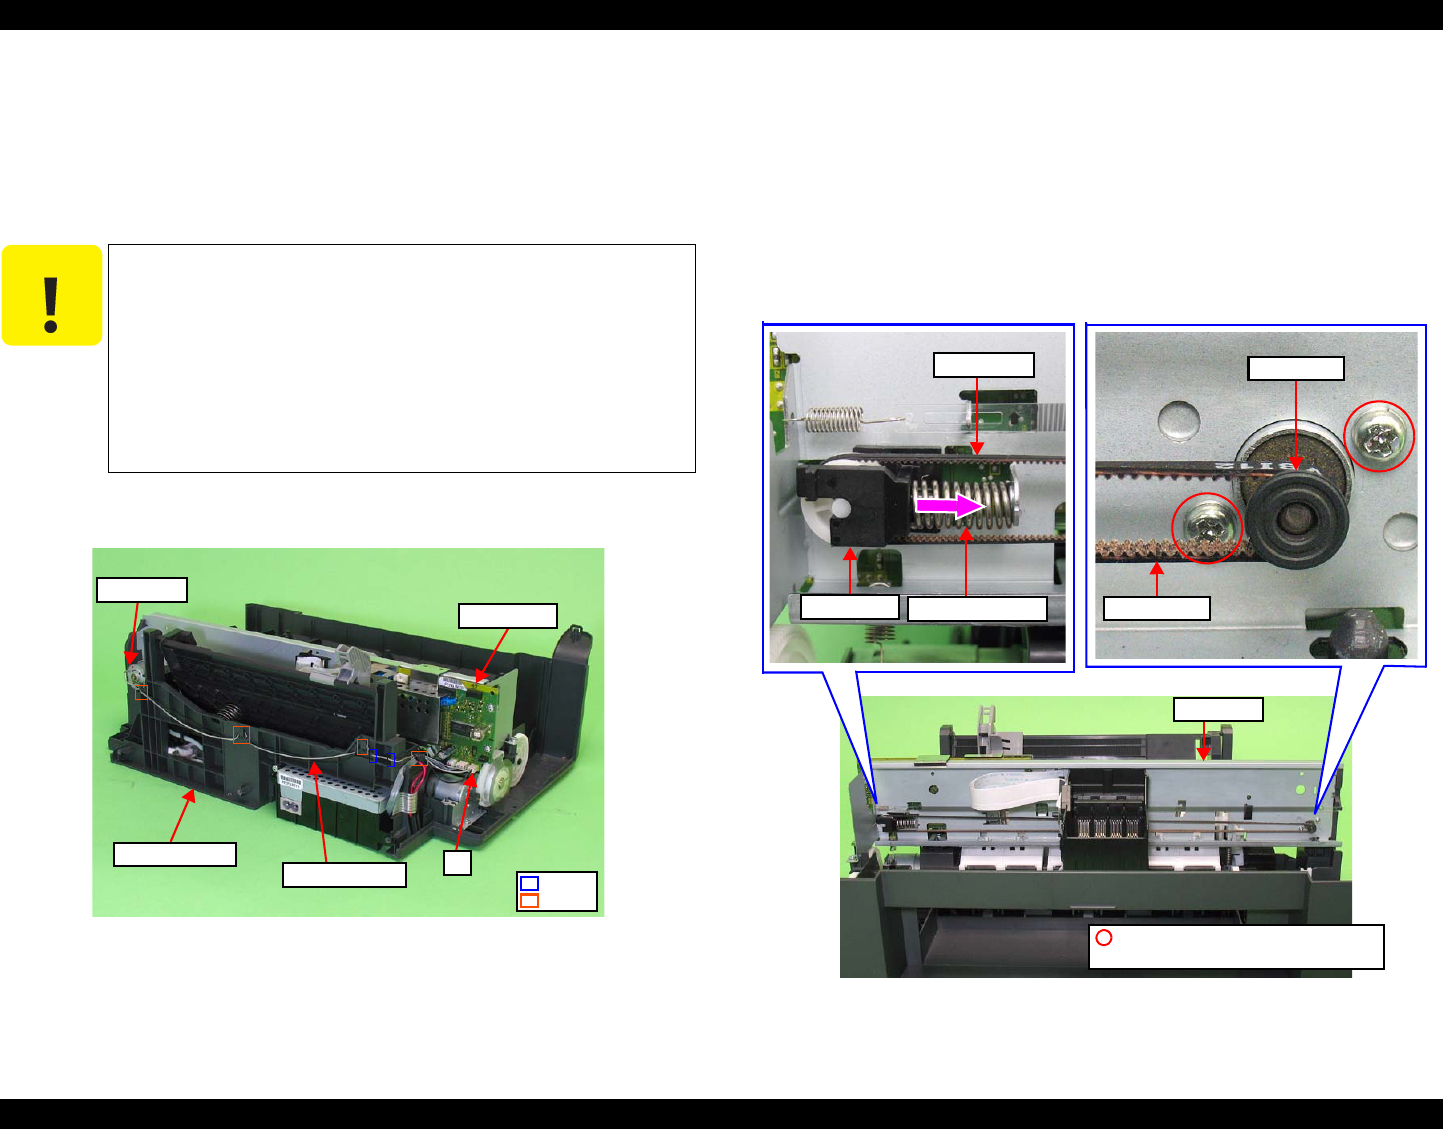
4.5.6 CR Motor/ Driven Pulley
Parts/Components need to be removed in advance:
Scanner Stand/Cover Wire (p 60), Scanner Unit (p 62), Middle Housing (p 63)
Panel Unit (p 64)
Removal procedure
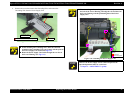
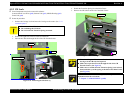
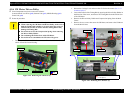
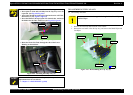
1. Disconnect the CR Motor Cable from connector J7 on the Main Board, and
release it from the Lower Housing.
Figure 4-45. Removing the CR Motor (1)
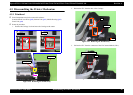
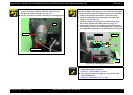
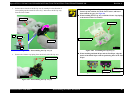
2. Release the Carriage Lock, and move the CR Unit to the center. (See "4.5.1
Printhead (p68)".)
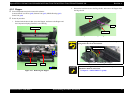
3. Loosen the tension of the Timing Belt by pressing the Driven Pulley Holder in
the direction of the arrow, and remove the Timing Belt from the Pinion Gear
of the CR Motor.
4. Remove the Driven Pulley Holder and Compression Spring from the Main
Frame.
5. Remove the two screws that secure the CR Motor, and remove the CR Motor
from the Main Frame.
Figure 4-46. Removing the CR Motor (2)
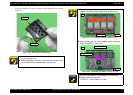
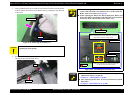
C A U T I O N
Be careful not to break the soldered portion of the CR Motor.
When removing the CR Motor and Driven Pulley, make sure to
hold the Timing Belt somehow so as not to allow the grease of
Main Frame to come in contact with the Timing Belt. It may
damage the Timing Belt.
Be careful not to lose the Compression Spring when removing
the Driven Pulley Holder.
Do not damage the Pinion Gear of the CR Motor.
Be careful not to contaminate the CR scale with grease.
J7
Main Board
CR Motor Cable
CR Motor
Lower Housing
Hook
Groove
Main Frame
SCREW SEMS M2.6x3.5 PAN HEAD+
(3.5±0.5kgfcm)
Pinion Gear
Timing Belt
TBD
Compression Spring
Driven Pulley
Timing Belt