


Epson STYLUS NX100/NX105/SX100/SX105/TX100/TX101/TX102/TX103/TX105/TX106/TX109/ME 300 Revision A
DISASSEMBLY/ASSEMBLY Disassembling the Printer Mechanism 84
Confidential
4.5.9 Main Frame
Parts/Components need to be removed in advance:
Scanner Stand/ Cover Wire (p 60), Scanner Unit (p 62), Middle Housing (p 63)
Panel Unit (p 64), Hopper (p 72), Main Board (p 65)
CR Motor/ Driven Pulley (p 75), Ink System (p 77), PF Encoder/ PF Scale (p 73)
Removal procedure
1. Remove the Grounding Spring. (See "4.5.8 PF Motor (p82)".)
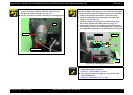
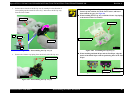
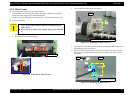
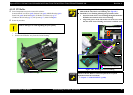
2. Remove the five Extension Springs.
Figure 4-71. Removing the Main Frame (1)
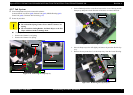
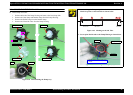
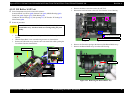
3. Remove the screw that secures the Bracket.
Figure 4-72. Removing the Main Frame (2)
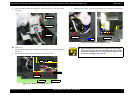
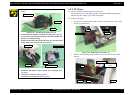
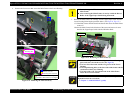
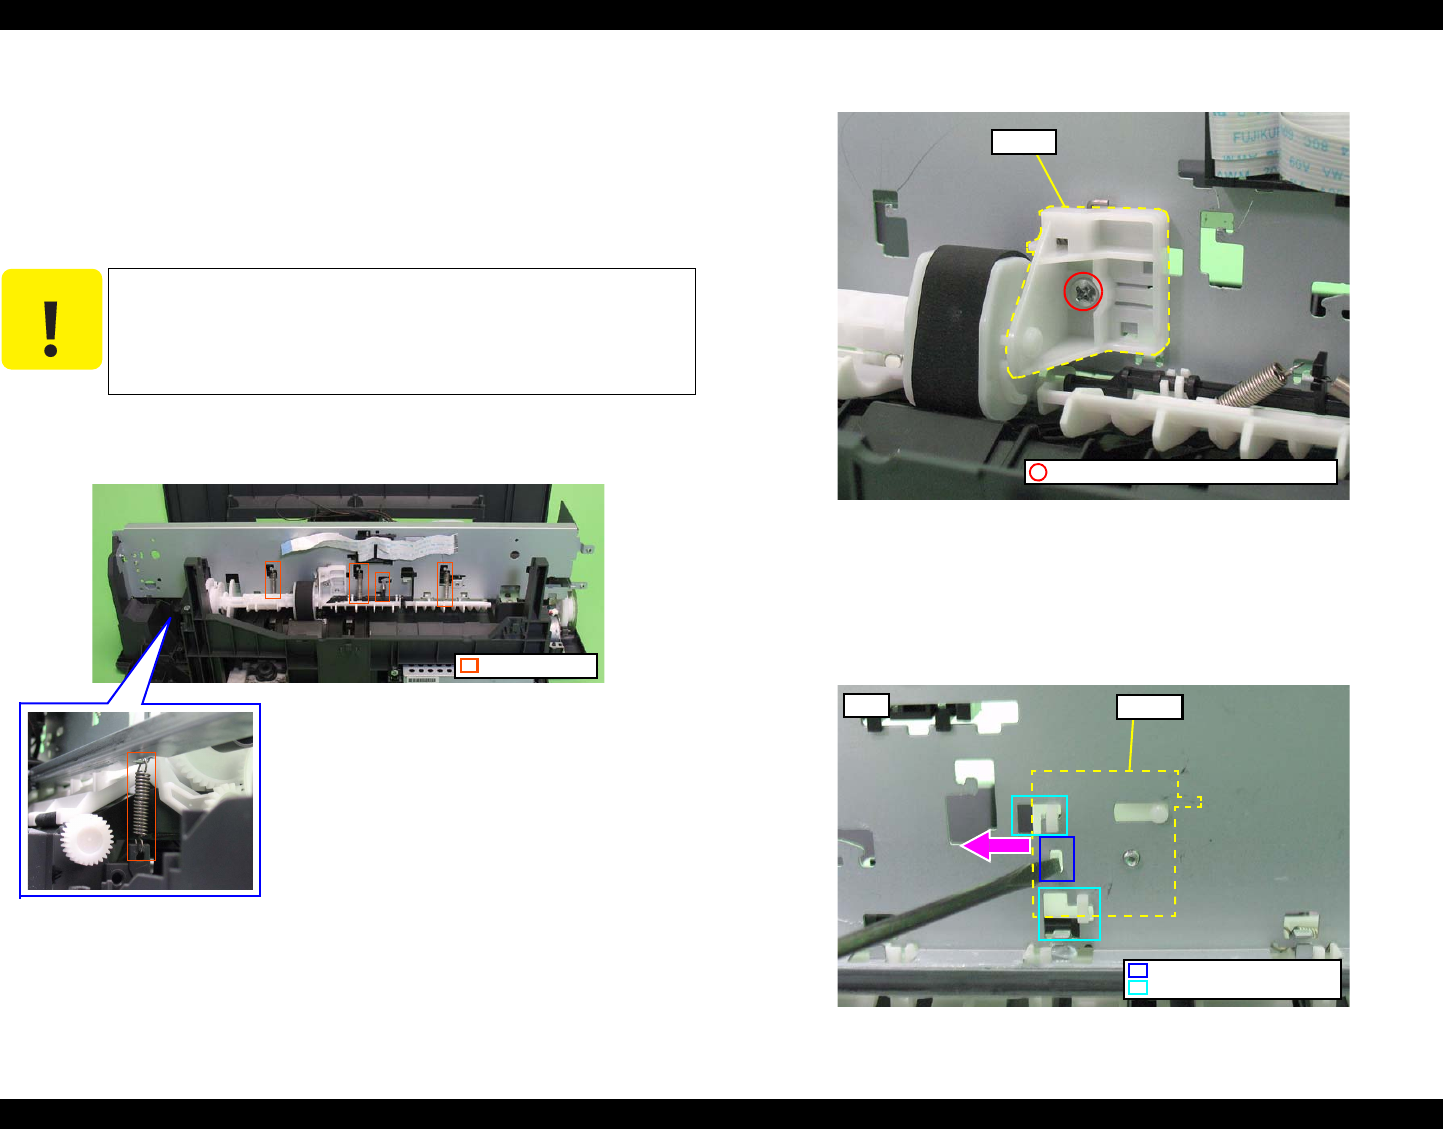
4. From the front of the Main Frame, release the central hook in the Bracket with
the flathead precision screwdriver.
5. Move the Bracket in the direction of the arrow to release the upper hook and
the lower one of the Bracket from the hole of the Main Frame, then remove
the Bracket.
Figure 4-73. Removing the Main Frame (3)
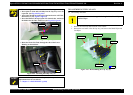
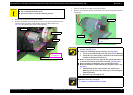
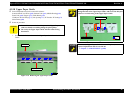
C A U T I O N
Be cautious not to touch the LD Roller and the roller part of the
Upper Paper Guide with bare hands to avoid degrading the
print quality.
Be careful not to deform the Extension Spring when removing
it.
Extension Spring
SCREW SEMS M2.6x3.5 PAN HEAD+
Bracket
Bracket
Front
Upper/lower hook and hole
Central hook