


Epson STYLUS NX100/NX105/SX100/SX105/TX100/TX101/TX102/TX103/TX105/TX106/TX109/ME 300 Revision A
DISASSEMBLY/ASSEMBLY Disassembling the Printer Mechanism 77
Confidential
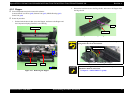
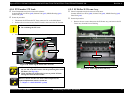
4.5.7 Ink System
Parts/Components need to be removed in advance:
Scanner Stand/Cover Wire (p 60), Scanner Unit (p 62), Middle Housing (p 63)
Panel Unit (p 64), CR Motor/ Driven Pulley (p 75)
Removal procedure
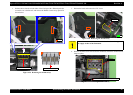
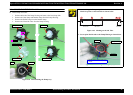
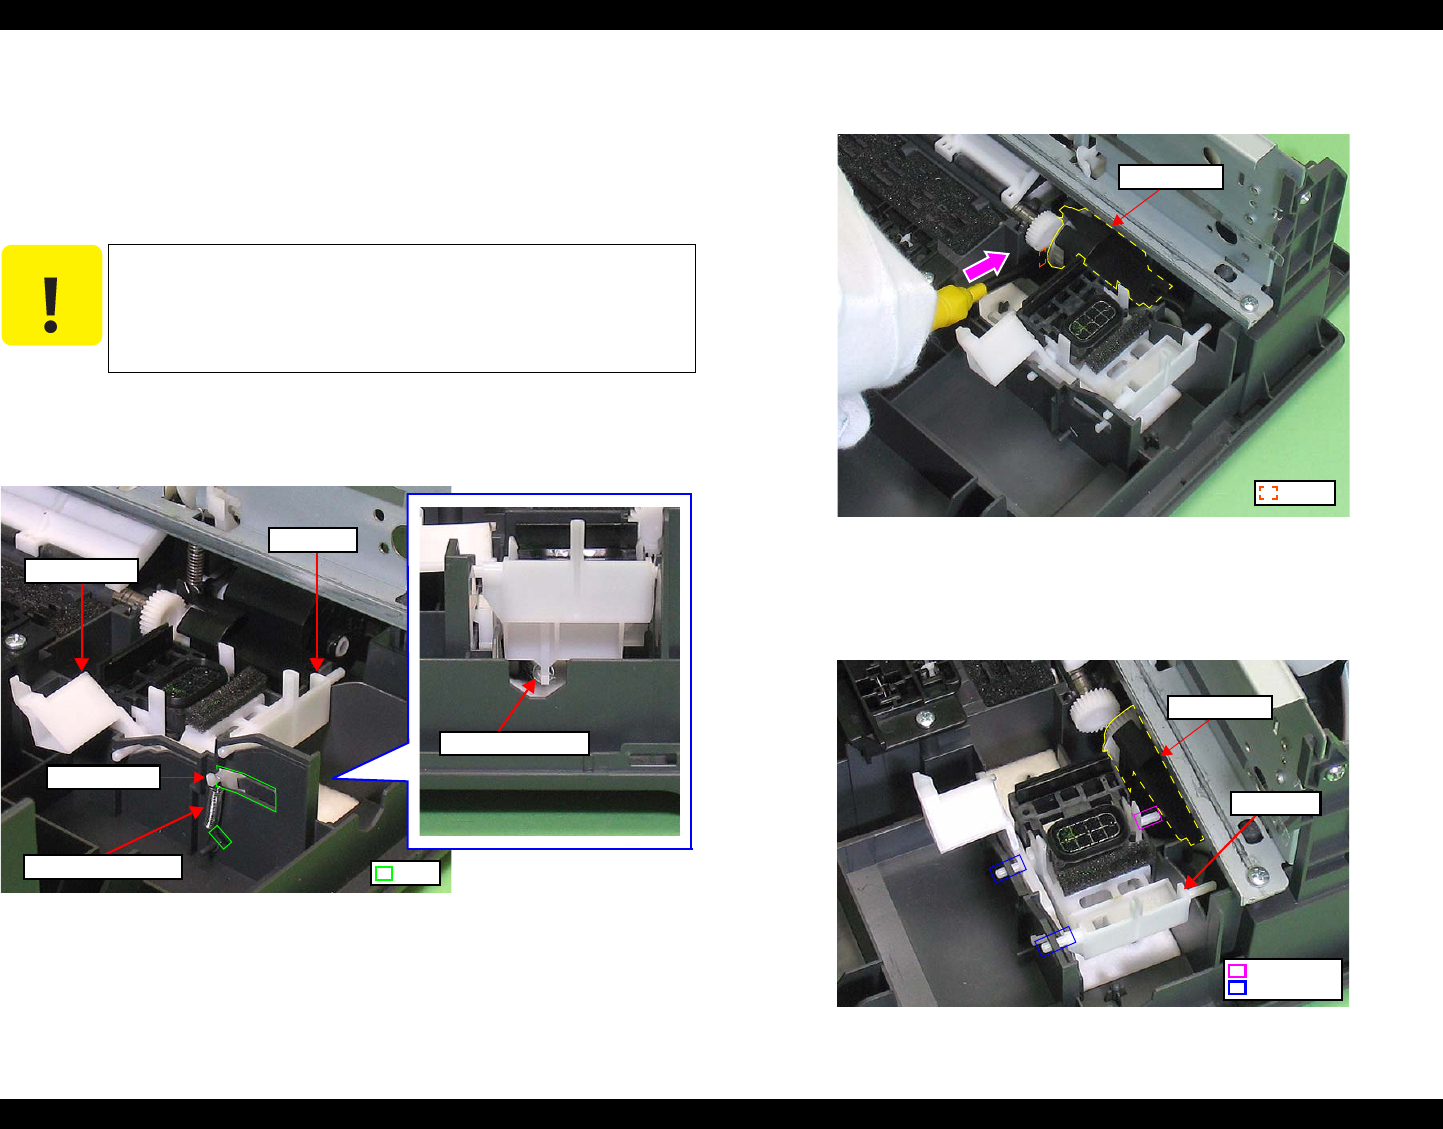
Cap Assy
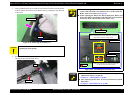
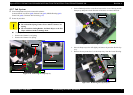
1. Remove the Cleaner Lever Spring.
2. Remove the Cleaner Case Spring.
Figure 4-49. Removing the Cap Assy (1)
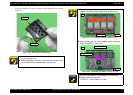
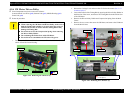
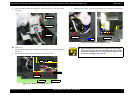
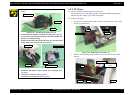
3. Insert a flathead precision screwdriver between the Lower Housing and the
Pump Assy and push it in the direction of the arrow to release the hook.
Figure 4-50. Removing the Cap Assy (2)
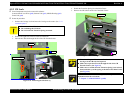
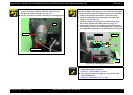
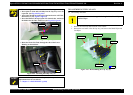
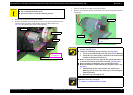
4.
Move the Pump Assy to the ASF slightly, and remove the protrusion B of the Cap
Assy.
5. Remove the two protrusion Cs of the Pump Assy from the Lower Housing.
Figure 4-51. Removing the Cap Assy (3)
C A U T I O N
Be careful not to contaminate the surroundings with ink.
Do not bend the Spring Cleaner Lever and the Cleaner Case
Spring.
Do not touch the Sealing Rubber, the Blade Wiper or the Felt
Wiper with bare hands or damage them.
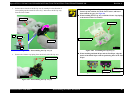
Cleaner Case Spring
Cleaner Lever Spring
Cap Assy
Hole
Lever Cleaner
Protrusion A
Pump Assy
Hook
Protrusion B
Cap Assy
Pump Assy
Protrusion C