


Chapter 5 115
Changing Your Computer Hardware Configuration
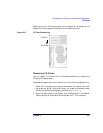
Removable Media Devices
opened so you can get to the CD drive’s audio, ATAPI and power
connectors.
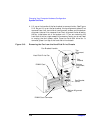
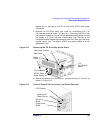
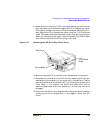
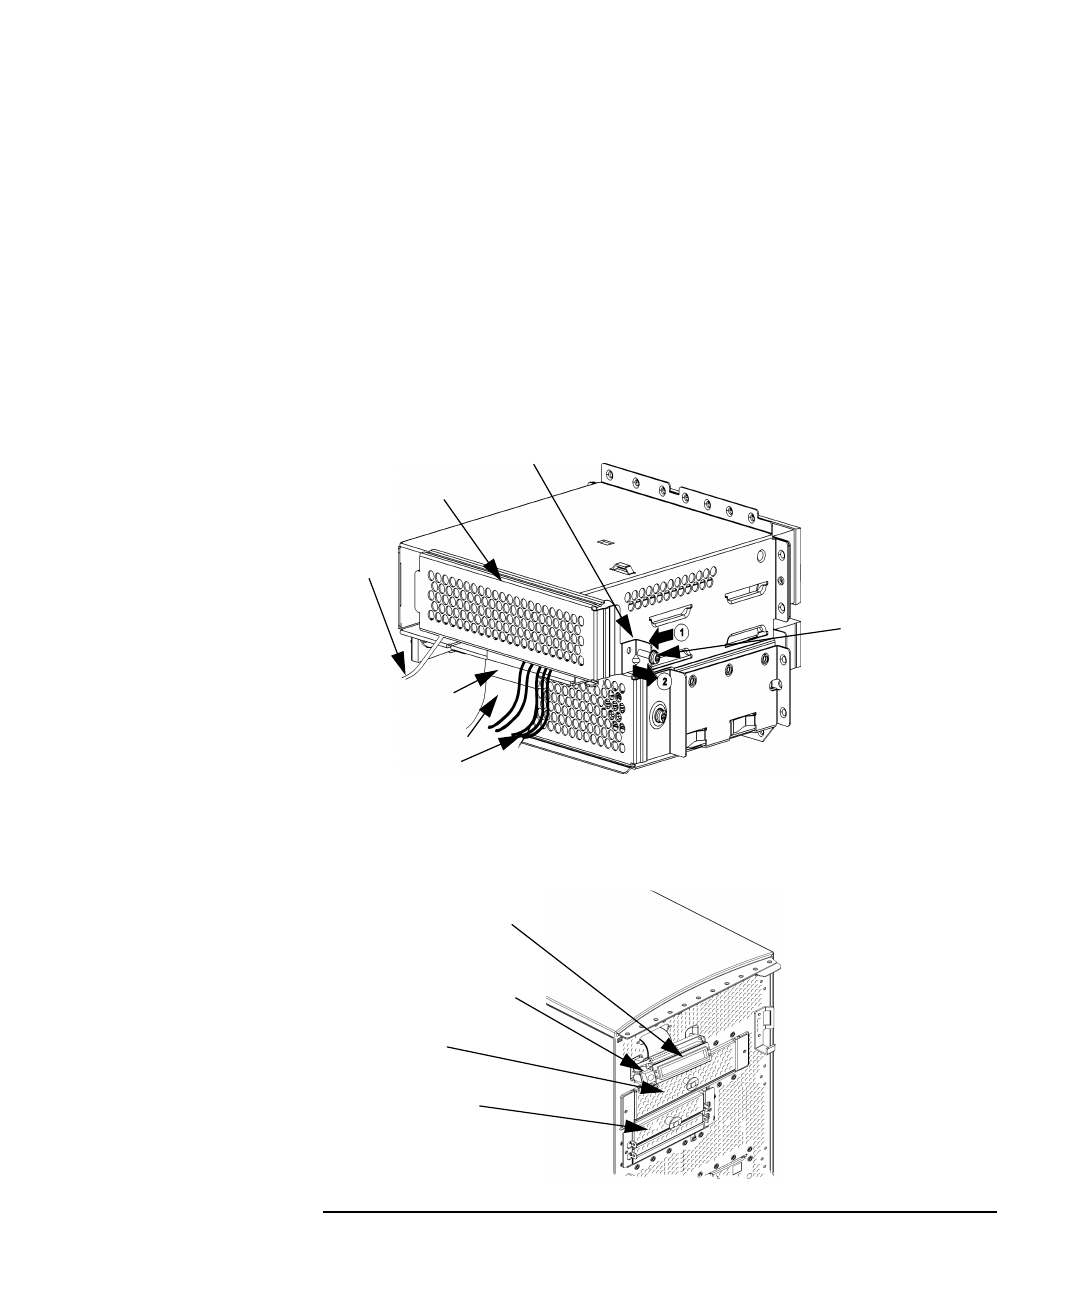
2. Remove the CD drive bay’s rear cover by unscrewing the T-15
Torx/slotted screw as shown in Figure 5-11. Note that the CD drive’s
rear cover is located on the rear of the removable media chassis inside
the system unit. Push the cover handle away from the rear of the
removable media chassis approximately one inch. Next pull the cover
handle toward you. The audio, ATAPI and power cables are now
accessible to you.
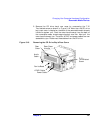
Figure 5-11 Removing the CD Drive Bay’s Rear Cover
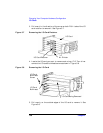
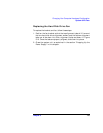
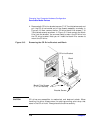
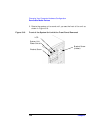
3. Rotate the system unit around until you see the front of the unit as
shown in Figure 5-12.
Figure 5-12 Front of System Unit with the Front Panel Removed
Rear Cover
Rear Cover Handle
Audio
Cable
Ferrite Bead
ATAPI Cable
Power Cable
T-15
Torx/Slotted
Screw
LCD Display
System Unit
Power Switch
CD drive
Blank
Floppy Disk
Blank