


Chapter 5 159
Changing Your Computer Hardware Configuration
Changing Your Monitor Type
Changing Your Monitor Type
Your system ships from the factory preset to use a monitor with a specific
resolution and frequency. If you replace your monitor with a different
type, you must reconfigure your computer to support it.
There are three ways to configure your computer to support a different
monitor type. They are discussed in the subsequent sections.
Setting the Monitor Type at Power On
If you replace your computer monitor with a different type of monitor,
and you have not set the computer’s graphics parameters by using the
Boot Console Interface’s monitor command, you can still configure your
computer’s new monitor type when you reboot the system.
To set the monitor type, you will need to:
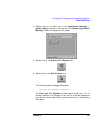
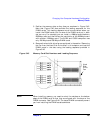
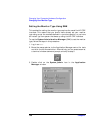
1. Press the Tab key after your keyboard’s Num Lock light comes on
during the boot process to initiate the automatic monitor selection
process. Your system will query you for a new monitor type. Note that
if you have waited more than 15 minutes for a monitor type to appear,
go to the section “Troubleshooting Monitor Problems” in this chapter.
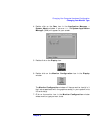
2. Select one of the monitor types listed on the screen and press Enter.If
your monitor is not listed in the section “Monitors” in the chapter
“System Overview” in this document, a common monitor type to
select is 12.
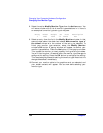
3. Answer yes, by pressing Y, to the system query to confirm your
selection. Note that if you do not make a selection, the system cycles
through the possible monitor types continuously until you do make
your selection. See the section “Displaying and Setting the Monitor
Type” in Chapter 6.
Setting the Monitor Type from the Boot Console
Interface
To change your computer’s graphics parameters before you replace your
monitor, go to the section “Displaying and Setting the Monitor Type” in
Chapter 6.