


Chapter 5 143
Changing Your Computer Hardware Configuration
Hard Disk Drives
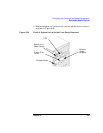
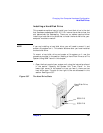
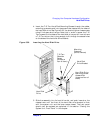
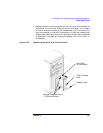
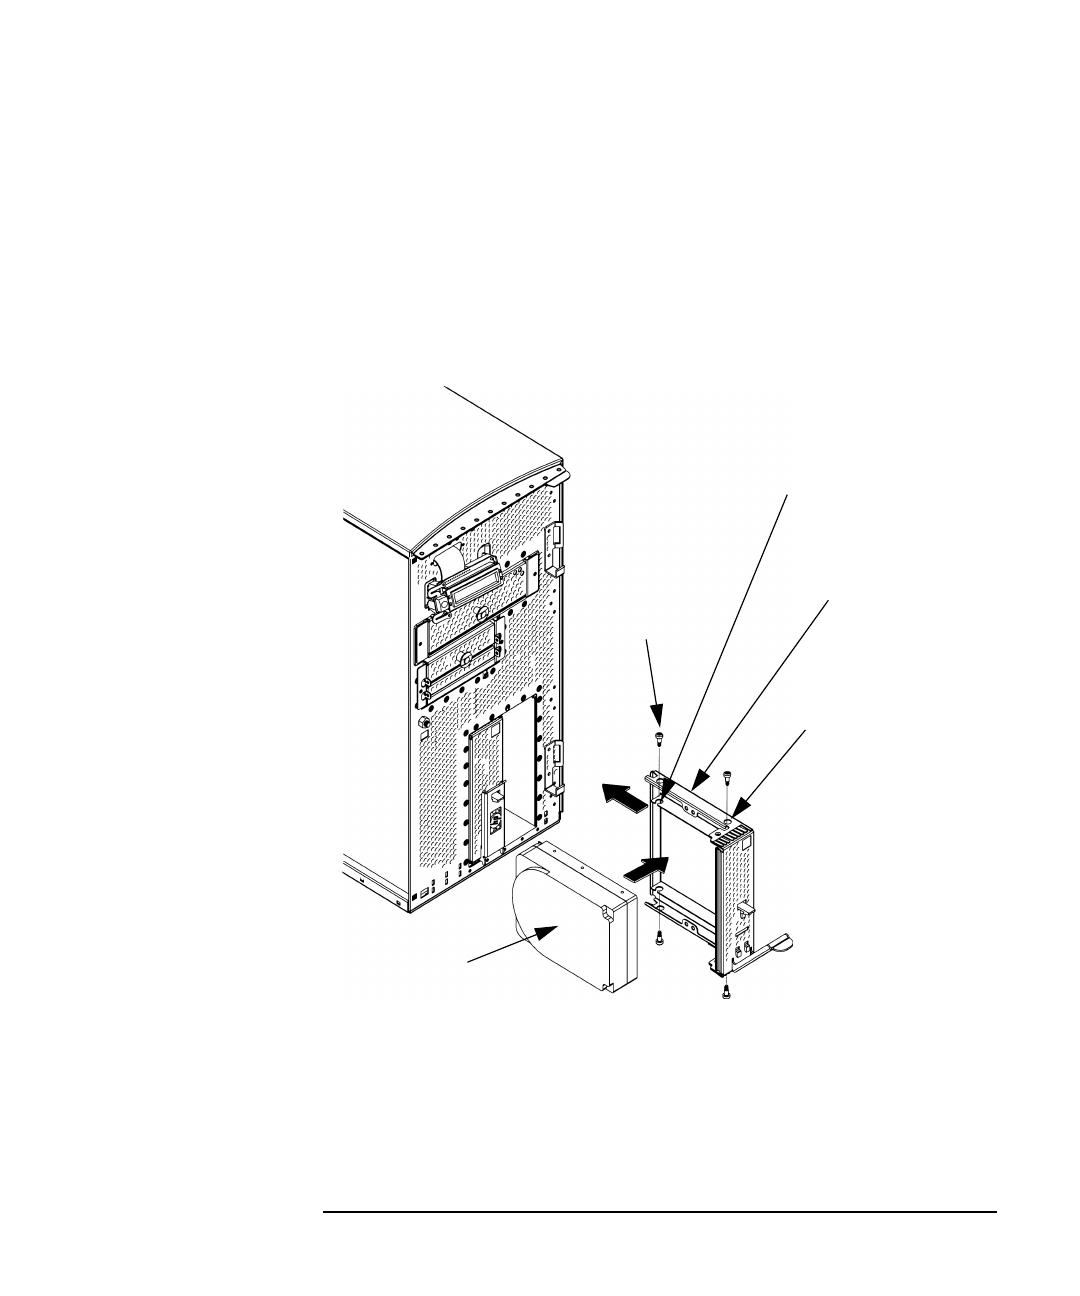
4. Insert the T-15 Torx Hard Disk Mounting Screws through the rubber
mounting grommets and into the screw holes located on the sides of
the hard disk drive. See Figure 5-39. You should tighten these screws
using 6 inch-pounds of torque. Note that in order to screw the T-15
Torx screws into the sides of the hard disk drive you will have to have
a T-15 Torx driver that is long enough to fit through the access holes
on the sides of the hard disk drive bracket.
Figure 5-39 Inserting the Hard Disk Drive
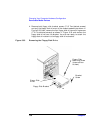
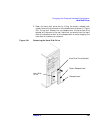
5. Slide the assembly into its hard drive slot, and push inward on the
release lever until the front of the hard disk drive bracket is flush
with the system unit and the lever snaps closed. The front panel
should now be replaced as explained in the section “Closing the
System Unit Front Panel” in this chapter.
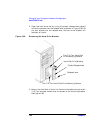
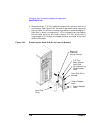
Hard Disk
Drive Bracket
Mounting
Grommet
(do not remove)
Hard Disk
Drive
T-15 Torx
Shoulder
Screw
Hard Disk Drive
Mounting Screw
Access Hole
(there are four of
them)
(there are
four of them)