


156 Chapter5
Changing Your Computer Hardware Configuration
Memory Cards
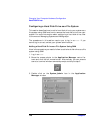
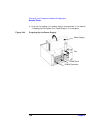
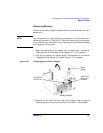
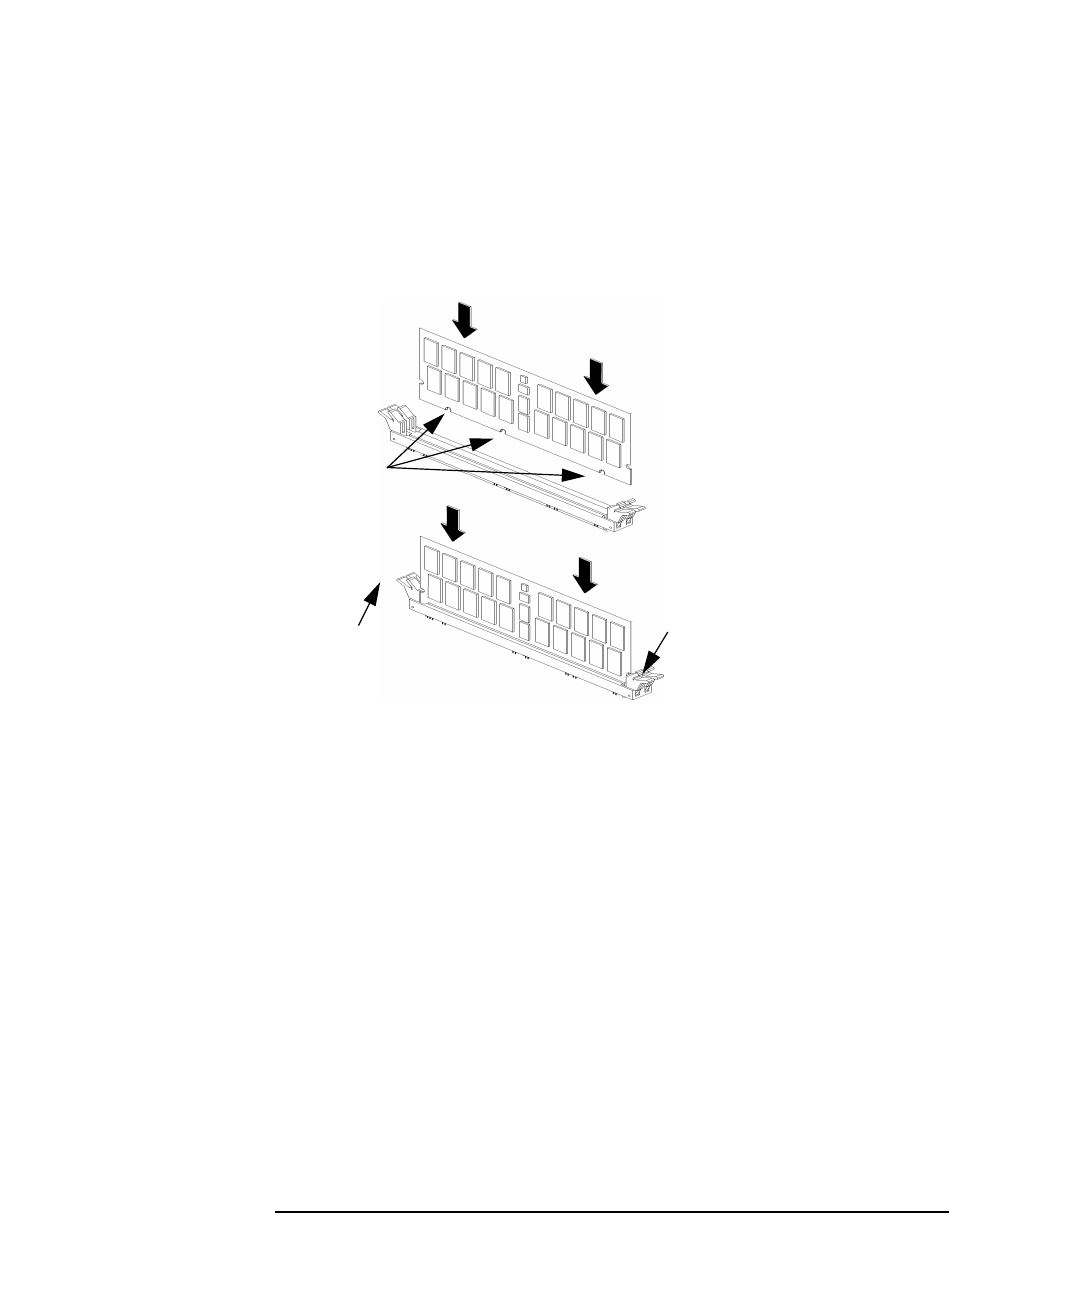
5. Press downward on the ejector tabs located on both sides of the
DIMM connector. See Figure 5-46. This opens the connector for
DIMM card insertion.
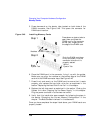
Figure 5-46 Installing Memory Cards
6. Place the DIMM card in the connector, lining it up with the guides.
Make sure you align the notches on the bottom edge of the DIMM
card with the DIMM connector keys. See Figure 5-46.
7. Press firmly and evenly on the DIMM card to ensure that it seats
properly, and replace the hard disk drive fan as explained in the
section “Replacing the Hard Disk Drive Fan” in this chapter.
8. Replace the left side panel as explained in the section “Closing the
System Unit after Propping Up the Power Supply” in this chapter.
Plug the power cord back in to the electrical outlet.
9. Verify that this installation was successful by following the steps in
the section “Displaying the Current Memory Configuration” in the
chapter “The Boot Console Interface” in this document.
Once you have completed the steps listed above, your DIMM cards are
properly loaded.
Notches
Black
Ejector Tab
White
Ejector Tab
Press down on ejector tabs to
open them and place the
DIMM card in the connector
so that your fingers are on
the edge of the DIMM card.
Push the DIMM card down
firmly and evenly into the
connector to be sure it is
properly seated.
Step 2
Step 1