


Chapter 5 153
Changing Your Computer Hardware Configuration
Memory Cards
Memory Cards
This section contains information regarding the installation and removal
of memory (DIMM cards). However, before continuing with this section,
please take time to read the following list of considerations:
• Use the procedure described in “The Boot Console Interface” chapter
to determine the current memory configuration for this computer.
This should be done before trying to install additional memory
DIMMs in your computer.
• Read over the steps in the section “Installing Additional Memory”
before you begin the installation of your DIMM cards.
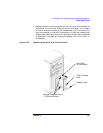
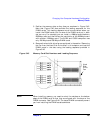
• Inserts DIMMs in the order shown. Please refer to Figure 5-45.
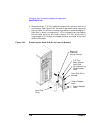
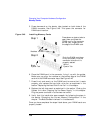
• Be sure you understand the proper orientation for DIMMs when
inserting them into their connectors because the connectors are keyed
to prevent you from putting them in backwards. See Figure 5-46.
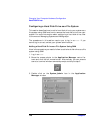
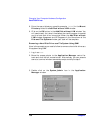
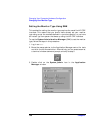
• Use the “Boot Console Interface” to verify that the computer
recognizes the additional DIMMs when you have finished installing
them. Note that you can also use SAM and select the Performance
Monitor icon, then the System Properties icon, and in the window
that appears, select the tab labeled Memory.
Installing Additional Memory
Perform the following steps to add memory (DIMM cards) to your
computer.
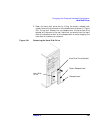
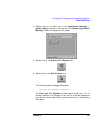
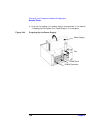
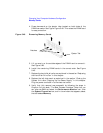
NOTE Lay the system on its right side (using the system unit’s front panel as a
reference) as shown in Figure 5-44. Note that before laying the system
unit on its side you should put it on a cushioned surface to avoid damage
to the system unit’s exterior.
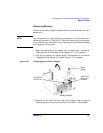
1. Open the side panel of the system unit as explained in the section
“Opening the Left Side Panel of the System Unit” in this chapter.