


Using the Océ TDS800 to scan-to-file 75
File mode
File mode can be ‘Off’, ‘On’ or ‘On with checkprint’. ‘Off’ means scan-to-file
is not active. ‘On’ means scan-to-file is active. To scan to file with a checkprint,
activate both the file mode and the print mode on the scanner operator panel.
The checkprint quality corresponds to the scan resolution. A checkprint is a
print of the scanned original, ensuring consistency with a later print of the
scanned file.
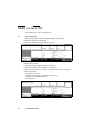
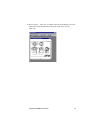
▼ How to scan to file with checkprint
1
Press the section key above the File section two times
The File mode is switched on
2 Press the section key above the Print section two times
The Print mode is switched on
3 The system is now ready to scan-to-file with checkprint.
Note: The Océ TDS800 system does not allow you to change the ‘File mode’
setting during a set from ‘On’ to ‘Off’ and the other way round. However
changing from ‘On’ to ‘On with checkprint’ and vice versa is allowed.
Note: In scan-to-file mode the automatic behavior is optimised for scanning.
Turning checkprint on or off does not influence this automatic behavior.
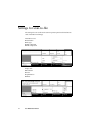
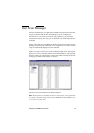
Destination
You can store your scan either in the temporary store on the controller or on a
network destination. You can define up to ten destinations in the Océ Scan
Manager application. Select the destinations defined in Océ Scan Manager on
the scanner operator panel. You can only select one destination at a time.
▼ Select a destination
1
Press the function key to select destination.
Note: Define the names of the destinations in Océ Scan Manager (see ‘Create
a local destination’ on page 82).