


Using the Océ TDS800 to scan-to-file 87
Scanned files
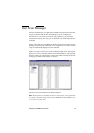
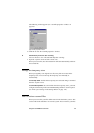
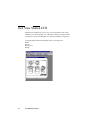
The right pane of the Océ Scan Manager contains the scanned files and
additional information about the files. You can view, print and delete these
files. You can also view the file properties.
▼ View a scanned file
1
Select a file in the right pane.
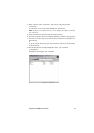
2 Open the ‘File’ menu and select ‘View’ or click the ‘View’ button on the
toolbar (see Figure 35).
[35] ‘View’ button on the toolbar
Océ View Station LT (see ‘Océ View Station LT®’ on page 92) starts up and
displays the file.
When you enable ‘Automatic view’ on the Océ Scan Manager, Océ View
Station LT starts up automatically after scan to file.
Note: When you scan to file the controller Océ View Station LT starts
automatically, showing the result of the scan.
▼ Print a scanned file
1
Select a file in the right pane.
2 Open the ‘File’ menu and select ‘Print’ or click the ‘Print’ button on the toolbar
(see Figure 36).
[36] ‘Print’ button on the toolbar
The selected file will be printed with the default settings as defined in the Océ
Settings Editor.
▼ Delete a scanned file
1
Select a file in the right pane.
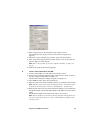
2 Open the ‘File’ menu and select ‘Delete’ or click the ‘Delete’ button on the
toolbar (see Figure 37).
[37] ‘Delete’ button on the toolbar.