


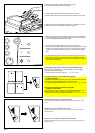
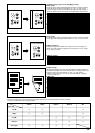
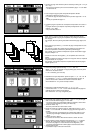

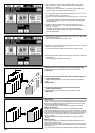
8. Select the margin position on the front side. This position can be selected
from among “Left M.”, “Right”, “Top M.” and “Bottom”.
When no margin is made on the front side, touch the “No margin” key.
8. Sélectionner la position de marge sur le recto. Il est possible de
sélectionner cette position parmi les positions "Marge G", "Droit", "Marge
H" et "Bas".
Lorsqu'on ne veut créer aucune marge sur le recto, effleurer la touche
"Sansmarge".
8. Seleccione la posición de margen en el lado frontal. Pude seleccionar
esta posición entre "M.Izq.", "Derecho", "Mar S" y "Abajo".
Cuando no se hace un margen en el lado frontal, toque la tecla "No
margen".
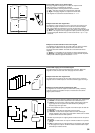
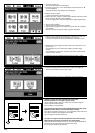
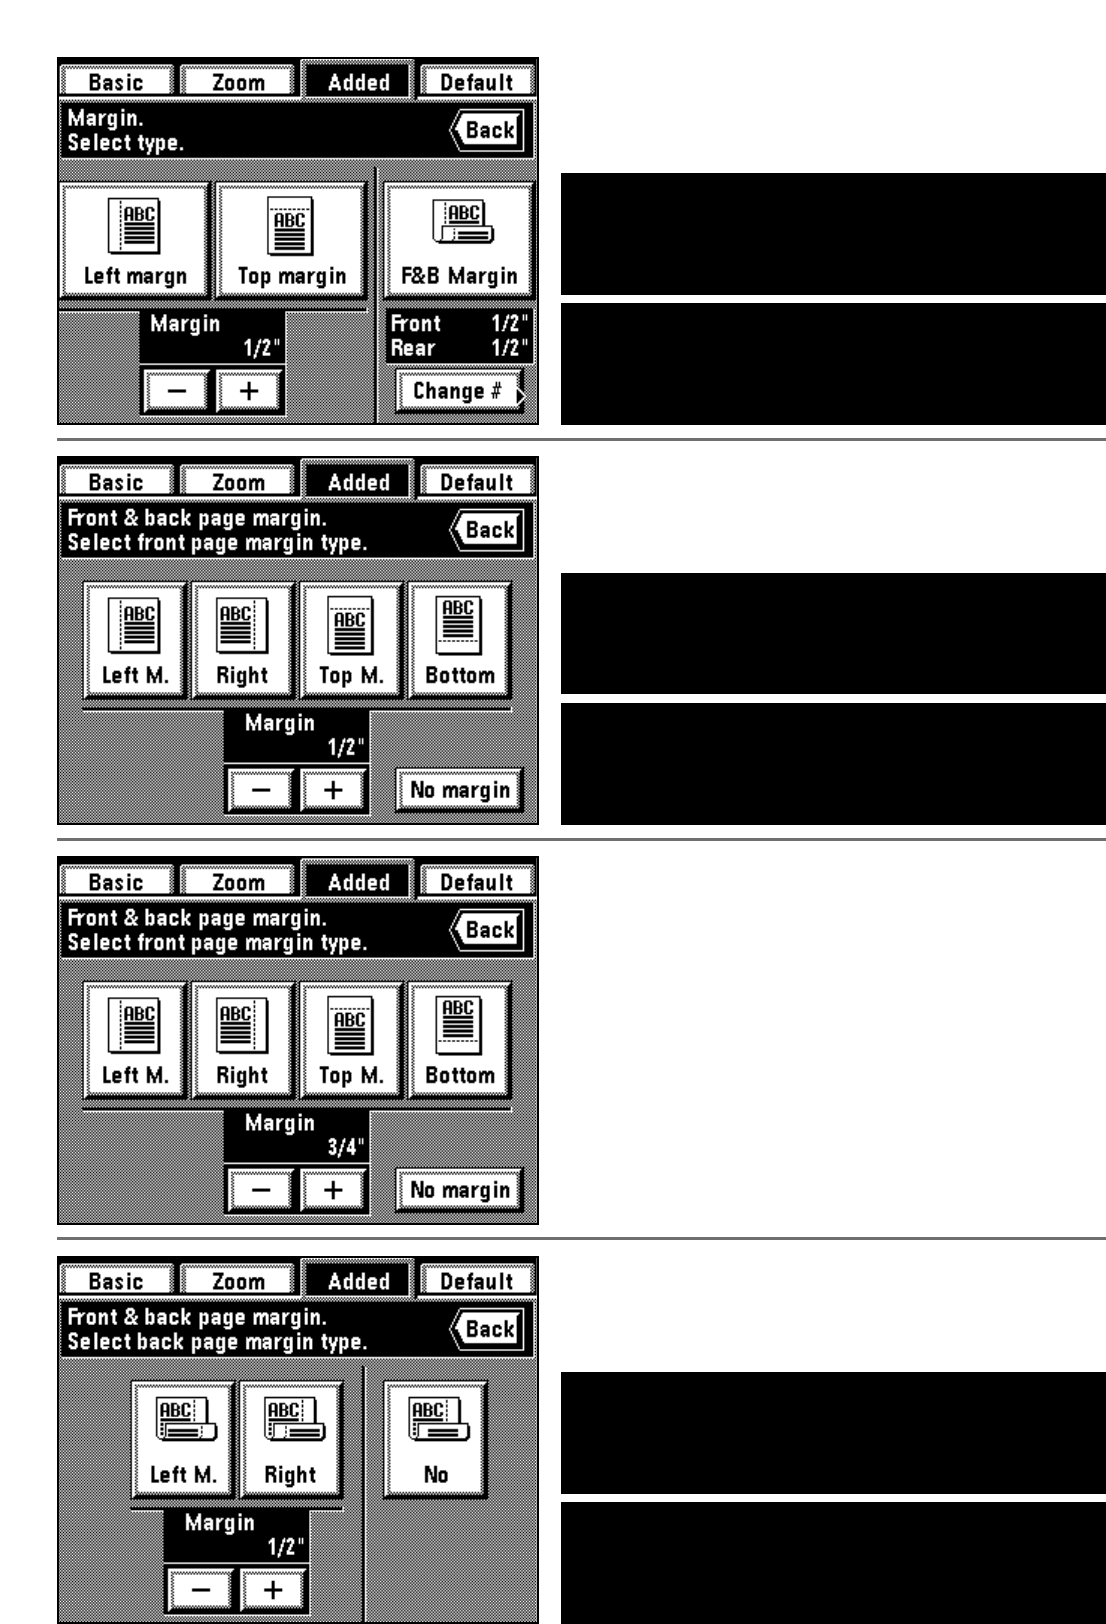
9. Select the margin width on the back side by touching the “+” key or “-” key
under the margin width display.
The margin width can be selected from among 1/4”, 3/8”, 1/2”, 5/8” and
3/4”.
* When the margin width setting is not changed, go to next step.
9. Sélectionner la largeur de marge sur le verso en effleurant la touche "+"
ou la touche "-" sous l'affichage de largeur de marge.
La largeur de marge peut être sélectionnée parmi les valeurs 1/4 po., 3/8
po., 1/2 po., 5/8 po. et 3/4 po.
* Si l'on ne désire pas changer la largeur de marge, passer à l'étape
suivante.
9. Seleccione el ancho de margen en el lado de atrás tocando la tecla "+" o
"-" en la indicación de ancho de margen.
Se puede seleccionar el ancho de margen entre 1/4", 3/8", 1/2", 5/8" y
3/4".
* Si no se va a cambiar el ajuste de ancho de margen, vaya al siguiente
paso.
59
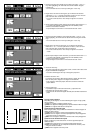
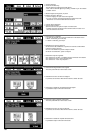
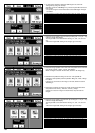
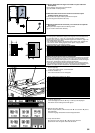
6. To change the contents in which the F&B margin is set, touch the
“Change #” key and go to next step.
Otherwise, touch the “F&B Margin” key. The touch panel will return to the
basic screen.
* The previous figure is set as initial value for the F&B margin. Change it
as needed.
6. Pour changer le contenu dans lequel la marge R/V est réglée, effleurer la
touche "Changez #" et passer à l'étape suivante.
Sinon, effleurer la touche "Marge R/V". Le panneau de touches à
effleurement retourne à l'écran de base.
* Le chiffre précédent est établi comme valeur initiale pour la marge R/V.
Le changer si besoin est.
6. Para cambiar el contenido del ajuste de margen F&A, toque la tecla
"Cambio #" y vaya al siguiente paso.
O toque la tecla "Margen F&A". La pantalla de toque volverá al menú
básico.
* La cifra anterior queda seleccionada como valor inicial para el margen
F&A. Cambie si fuera necesario.
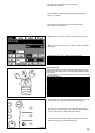
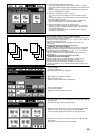
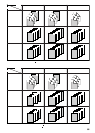
7. Select the margin width on the front side by touching the “+” key or “-” key
under the margin width display.
The margin width can be selected from among 1/4”, 3/8”, 1/2”, 5/8” and
3/4”.
* When the margin width setting is not changed, go to next step.
7. Sélectionner la largeur de marge sur le recto en effleurant la touche "+"
ou la touche "-" sous l'affichage de largeur de marge.
La largeur de marge peut être sélectionnée parmi les valeurs 1/4 po.,
3/8 po., 1/2 po., 5/8 po. et 3/4 po.
* Si l'on ne désire pas changer la largeur de marge, passer à l'étape
suivante.
7. Seleccione el ancho de margen del lado frontal tocando la tecla "+" o "-"
en la indicación de ancho de margen.
Se puede seleccionar el ancho de margen de entre 1/4", 3/8", 1/2", 5/8" y
3/4".
* Cuando no se cambia el ajuste de ancho de margen, vaya al siguiente
paso.