


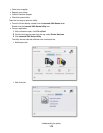


Printing a test page using the computer
1 Load plain paper.
2 From the Finder desktop, double-click the Lexmark 5000 Series folder.
3 Double-click the Lexmark 5000 Series Utility icon.
4 From the Maintenance tab, click Print Test Page.
A page prints.
If the test page did not print at all or has quality problems, attend to any error messages that appear on the
screen.
Improving print quality
These are possible solutions. Try one or more of the following:
Check paper
• Use the appropriate paper for the document. If you are printing photos or other high-quality images, for best
results use Lexmark photo papers.
• Use a paper that is a heavier weight or bright white.
Select a higher print quality
1 Depending on your print job, press Copy Mode or Scan Mode.
2 Press Quality.
3 Press or repeatedly until the quality you want appears.
4 Press .
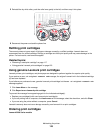
Check print cartridges
If the document still does not have the print quality you want, follow these steps:
1 Align the print cartridges. For more information, see “Aligning print cartridges” on page 118. If print quality has
not improved, continue to the next step.
2 Clean the print cartridge nozzles. For more information, see “Cleaning the print cartridge nozzles” on
page 118. If print quality has not improved, continue to the next step.
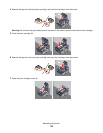
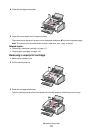
3 Remove and reinsert the print cartridges. For more information, see “Removing a used print cartridge” on
page 117. If print quality has not improved, continue to the next step.
4 Wipe the print nozzles and contacts. For more information, see “Wiping the print cartridge nozzles and contacts”
on page 119.
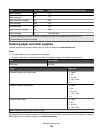
If print quality is still not satisfactory, replace the print cartridges. For more information, see “Ordering paper and
other supplies” on page 124.
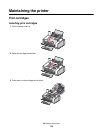
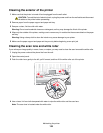
Maintaining the printer
121