


Copy print settings
You can set three print parameters for copy:
• Print reduction rate for copy
• Print margin for copy
• Bypass Tray priority
You set these three in the same procedure, discussed below. Following is an explana-
tion for each:
Print reduction rate
Copy reduction lets you set the machine to reduce large documents to a size that fits
the paper in your machine. (This setting doesn’t affect printing fax message you
may receive with your machine.)
Print margin
Your machine’s print margin for copying is measured in millimeters (mm). We’ll
define print margin by explaining how it’s used:
When an original document is scanned, the machine measures the document’s
length and compares it to: (a) the length of your selected paper (not include the
print margins) plus (b) the print margin you set. If the length of the document is
longer than (a) and (b) put together, your machine prints the document on more
than one sheet.
Note: A print margin setting of 24 mm will print most documents as single pages.
Try this combination first and then, only if you have problems with it, select
different settings.
Bypass Tray priority
If you set the same sized paper to both the paper cassette and bypass tray, and this
mode is turned to on, the machine gives priority to use the paper which is set on the
bypass tray than the paper in the cassette.
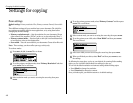
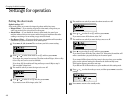
To adjust the copy print settings
Default setting: Copy reduction rate: 100%, Margin: 24 mm,
Bypass tray priority: Off
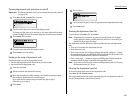
1
Press
MENU
,2,3,0,2,
ENTER
. The
LCD
shows the current print margin for
copying:
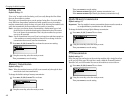
2
To set the reduction rate for copying, select “Reduction Ratio” using the
cursor key and then press
ENTER
. The
LCD
will show:
3
Using the cursor key to select Auto, 100% or 78% for the copy reduction set-
ting. Then press
ENTER
.
4
To set the reduction margin for copying, select “Reduction Margin” using
the cursor key and then press
ENTER
. The
LCD
will show:
5
Use the numeric keypad to enter the print margin you want, from 00 to 85.
Then press
ENTER
.
Note: Enter a leading zero when entering a quantity less than 10.
6
To set the bypass tray priority, select “Bypass Tray Priority” using the cur-
sor key and then press
ENTER
. The
LCD
will show:
In case of the same size papers are set in the cassette and on the bypass tray,
the cassette has a priority to supply papers. If you want the bypass tray to
have a priority, select ON.
7
Using the cursor key to select “ON” or “OFF” for the bypass tray priority set-
ting. Then press
ENTER
.
8
When you finished the setting, select “Exit ” and then press
ENTER
to save
the settings.
Changing the default settings
4.7