


Pelco Manual C690M-E (11/04) 33
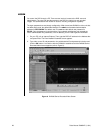
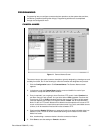
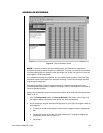
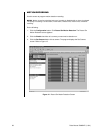
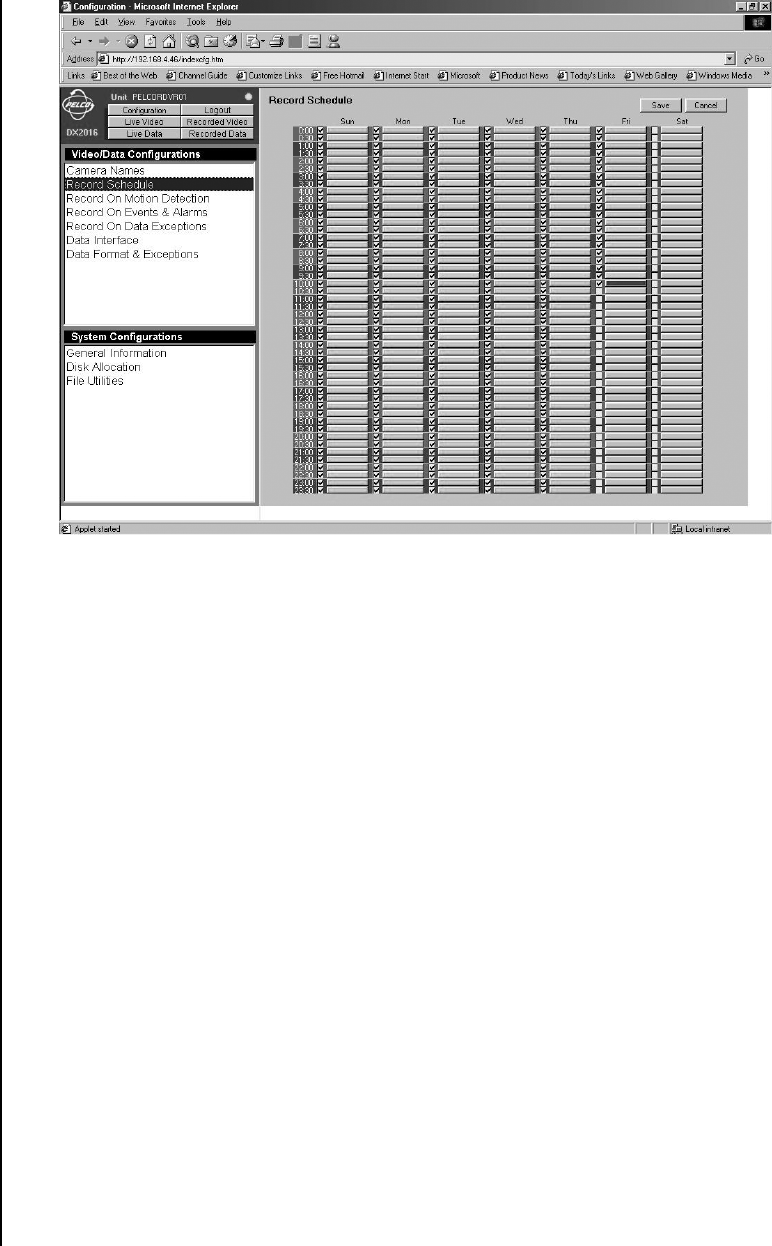
Figure 12. Record Schedule Screen
NOTE:
In order to maximize hard drive storage space, the DX2000 uses images from
scheduled recording to display images for a transaction. To do this, you need to set scheduled
recording appropriately (for example, at the right image rate, quality, etc.) and for all hours the
cash register or ATM is operational.
Or, if scheduled recording is not desired, you can enable a blank exception (refer to the
Data
Exceptions
section) and program it for exception recording. This will record images automati-
cally during any transaction.
If scheduled recording is used for regular transactions, exception recording can be at an
increased speed and/or quality. If exception recording is used, all transactions are recorded at
the same speed and quality.
Use the Record Schedule screen to set the times and days of the week that recording will be in
effect. To do so:
1. Click the Configuration button. Click Record Schedule. The screen (refer to Figure 12)
that appears displays seven days, each broken into half-hour segments.
2. Do the following to program individual time segments or go to step 3 to program a block of
time segments.
a. To select an individual time segment, check mark the segment under the appropriate
day.
b. Double-click the bar to the right of a check-marked time. The program displays the
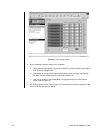
Set Camera screen (refer to Figure 13).
c. Go to step 4.
SCHEDULED RECORDING