


60 Pelco Manual C690M-E (11/04)
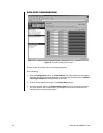
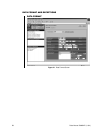
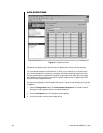
6. In the Hour Format field, use the pull-down menu to select either 12-hour or 24-hour
(military) format.
7. In the Time Format field, use the pull-down menus to choose the order in which you want
the time displayed. The choices are hour (HR), minute (MIN), and second (SEC). (Note
that a blank is available only in the last Time Format selection box. The blank is provided
to specify that no seconds be used in the time field.) Also, select from the provided
symbols the separator (for example, period or colon) to use in the time field. To the right of
the entry fields, the program displays an example of how your selection might appear in
the data.
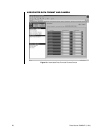
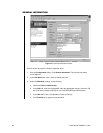
8. In the Transaction Start Format field, use the first pull-down menu to identify the text or
field that indicates the start of each transaction. This can be the date or time, a word or
phrase, or a combination thereof.
Transaction Start Format is case sensitive and must match the receipt exactly. You can
find the formats of your ATM or POS device by doing the following: click the Live Data
button and then click the Diagnostics button. Then press any key on the device to
indicate the start and end positions of the transaction.
Choose from the following:
Selection Meaning
None First part of transaction field is not used.
CR Carriage Return character (13 in ASCII).
LF Line Feed character (10 in ASCII).
FF Form Feed character (12 in ASCII).
DATE Date field.
TIME Time field.
TEXT When selected, another field appears to let you enter a text string up to 20
characters that defines the start of the transaction.
Select a second identifier for the Transaction Start from the following:
Selection Meaning
None Second part of transaction field is not used.
CR Carriage Return character (13 in ASCII).
LF Line Feed character (10 in ASCII).
FF Form Feed character (12 in ASCII).
DATE Date field.
TIME Time field.