


Pelco Manual C690M-E (11/04) 85
Do the following to search for and play back recorded video:
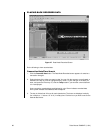
1. Click the Recorded Video button. The Video Mode Recorded screen appears.
2. Select the date of the video you want to view. You can click the arrows to move forward or
backward one day at a time. Or highlight the day, month, or year and type in what you
want, and press Enter. Click the Today button if you want the current date and it is not
displayed.
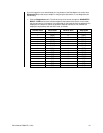
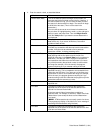
Hours in which there is recorded video are displayed in color. Green indicates the record-
ing is scheduled, yellow indicates an event triggered the recording, red indicates an alarm,
and blue means motion started the recording.
If you choose to play scheduled recording, all other modes of recordings will also play
(motion, event, and alarm).
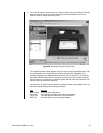
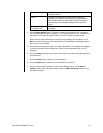
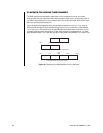
3. The day is divided into 24 hours for each camera. The hours are displayed vertically (for
example, a “1” above a “0” is 10) in military time. Click the hour you wish to see. The
Video Clip Display screen is displayed.
4. Recorded information for the selected hour is divided into five-minute blocks. Click the
block for the time you wish to view. The program displays a menu with the minutes listed.
5. Click the minute at which you want the recorded video to begin playing back. Use the
buttons below the picture to control playback. Refer to the
Playback Control Buttons
section.
(To resume live video when viewing a video clip recorded from live mode, click the Stop
button or the open file icon or the close file icon, and then click Play or the number of the
camera you want to view.)