C1534M (1/06) 45
NAVIGATE BETWEEN SITE MAPS
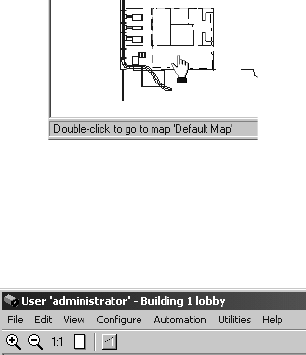
1. Move the mouse cursor over the site map. When you reach an area defined as a link, the cursor pointer changes to a hand. The destination
map image file name is displayed in the status bar.
Figure 52. Sample Map Site Link Area
2. Double-click the mouse inside the link area. The new image map appears.
3. To return to the previously viewed map, click the Back icon that appears on the site map tool bar after you have used a link.
Figure 53. Back Icon
ALTERNATE STEP 3
Press the Esc key on the keyboard.
You can also change the active site map by opening a map image from the Maps dialog box. Refer to Open a Map Image in the Configure Site
Maps section.
For information on creating links between facility image maps, refer to Create a Link to Another Site Map Image in the Configure Site Maps
section.
OPERATING THE SYSTEM
SELECT A CAMERA
1. Click a camera icon on the facility map image, and then drag it to one of the VMX200 video windows.
2. Release the mouse button. Video from the selected camera is routed to the specified VMX200 video window.
Next/Previous
1. Click in a VMX200 video window to select it.
2. Press the F4 key to advance to the next camera installed on the switcher currently being viewed. The sequence of installed cameras is
based on the system configuration, as programmed in the device configuration window.
OR
Press the F3 key to move to the previous camera installed on the switcher currently being viewed.
NOTE: If your system has more than one switcher, the Next and Previous commands cannot advance between switchers. Only the cameras on
the switcher currently being viewed can be called with the Next and Previous commands.


