46 C1534M (1/06)
Camera Following
The Camera Following feature provides an easy way to follow an object across an area covered by multiple cameras, such as a person moving
through a building, or a vehicle traveling along a roadway.
NOTE: An operator can also track objects through macros and/or using “Next” and “Previous” to “step” cameras along a route. However, the
Camera Following functionality switches a group of cameras in one step, and does not require operators to remember macro numbers or camera
numbers.
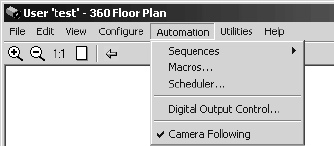
1. Click Automation on the site map window menu bar. If Automation does not appear on the menu bar, the user profile does not have
permission to access this feature. If necessary, ask an administrator to turn it on.
2. A check mark next to Camera Following indicates that the feature is turned on. If necessary, click Camera Following to turn the feature on.
Figure 54. Automation Menu
3. Double-click a VMX200 video window. The Camera Following functionality varies, depending on the type of system:
Single video system
Video from the associated camera(s) displays on the specified external monitor(s). If a site map has been associated with the camera, the
new site map image appears in the site map window.
Quad system
Video from the selected camera is routed to the first VMX200 video window. Video from the associated camera(s) is routed to the specified
VMX200 video window(s). Video from associated camera(s) may also display on external monitor(s), depending on the configuration. If a
site map has been associated with the camera, the new site map image appears in the site map window.
4. You can continue loading associated camera views by double-clicking any of the VMX200 video windows, or you can drag a camera icon
from the site map image to display a different camera view. If necessary, Select Automation > Camera Following to remove the check mark
and turn off the Camera Following feature.
CAMERA CONTROL
Once video has been routed to one of the VMX200 video windows, you can control the camera directly on the video image with the mouse. You
can also control certain camera functions with the keyboard. Refer to Table E.
NOTE: The camera control functionality described here applies to the video on the VMX200 video windows only, not to any external monitors
you may have connected to the VMX210 system.
Pan and Tilt Control
Click and hold the left mouse button while the crosshair pointer is inside the selected VMX200 video window. The camera will follow the
mouse’s movement.
The pan and tilt functions are under variable speed control. The further the mouse pointer is from the center of the VMX200 video window, the
faster the pan and tilt movement.
You can also control pan and tilt functions with the arrow keys or the numeric keypad on the VMX200 keyboard. Refer to Table E for a description
of keyboard control functions.
Zoom and Focus Control
Use the mouse wheel to zoom and focus the lens.
Zoom: While inside the selected VMX200 video window, roll the mouse wheel forward to zoom in and backwards to zoom out.
Focus: To focus, hold the Shift key while rolling the mouse wheel. If the camera features auto focus, the manual focus action will revert back to
auto focus following any subsequent mouse movement.


