


9-6 Maintenance and Specificationsbb ________________________
Warning! Allow fuser assembly to cool before removing.
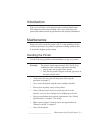
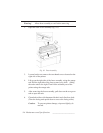
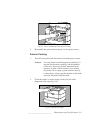
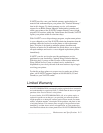
2. Open the fuser cover assembly (fig. 9.1).
Fig. 9.1 Fuser Assembly
3. Loosen but do not remove the two thumb screws located on the
right side of the printer.
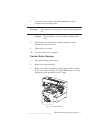
4. Lift up on the right side of the fuser assembly, using the orange
tab. Pull the right side of the fuser toward you, while sliding
the entire unit to the right. Then lift the assembly out of the
printer using the orange tabs.
5. After removing the fuser assembly, pull down on the two green
tabs to open the unit.
6. Clean both rollers with denatured alcohol and a lint-free cloth.
(Turn the fusing unit upside down to access the fusing roller.)
Caution: To prevent printer damage, wipe area lightly; do
not rub.