


Setting up Scanning
Phaser® 6128MFP Multifunction Printer
37
Setting up Scanning
This section includes:
• Scanning Setup Overview on page 37
• Setting Up Scanning to an FTP Server on page 39
• Setting Up Scanning to a Shared Folder on Your Computer on page 37
• Setting Up Scanning to an Email Address on page 40
• Setting Up Scanning - USB on page 40
See also:
Scanning on page 77
Scanning Setup Overview
The printer is enabled for scanning (if you are connected to a network). However, before
you can scan you must do the following:
• Scanning to a shared folder on your computer - Share the folder, and add the folder as
an Address Book entry in CentreWare IS.
• Scanning to an FTP server - Add the FTP server as an Address Book entry in
CentreWare IS.
• Scanning to an email address - Configure the email server in CentreWare IS.
If you are connected via USB, you can not scan to an email address or a network location.
You can scan to a folder on your computer, or scan into an application after you have
installed scan drivers and the Express Scan Manager utility. For more information about
installing scan drivers and utilities, see Installing the Software on page 31.
Setting Up Scanning to a Shared Folder on Your Computer
Before you can scan to a shared folder you must:
• Share the folder.
• Add the folder as an Address Book entry in CentreWare IS.
Note: CentreWare IS is a web-based interface that allows you to manage, configure, and
monitor your printer using the printer’s embedded web server. You can access
CentreWare IS by entering your printer’s IP address in your web browser.
Sharing the Folder - Windows
To enable a folder on your PC computer for network sharing:
1. Open Windows Explorer.
2. Right-click the folder you want to share, and then select Properties.
3. Click the Sharing tab, and then click Share this folder.
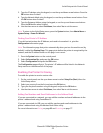
4. Click the Permissions button.
5. Select the Everyone group, and verify that all permissions are enabled.
6. Click OK. Write down the Share name; you will need it later.