Scanning
WorkCentre 7755/7765/7775 Multifunction Printer
System Administrator Guide
109
Note: If your printer is locked, you must log in as a system administrator. For details, see Accessing
CentreWare IS on page 17.
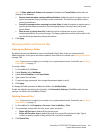
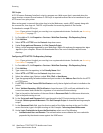
1. In CentreWare IS, click Properties > Services > Workflow Scanning > File Repository Setup.
2. Click Add New.
3. Type a name for the repository in the Friendly Name field.
4. Select SMB from the Protocol drop-down menu.
5. Select the address type. Options are IPv4 or Host Name.
6. Type the appropriately formatted address and port number in the Address: Port field for the
server where the file repository is located. The default port number is 139.
7. Type the Share Name in the Share field.
8. In the Document Path field, type the directory path of the folder starting at the root of the
shared folder. Example: If you have a folder named scans in the shared folder, type \scans.
9. Under Login Credentials to Access the Destination, select one of the following:
• Authenticated User and Domain: The authentication server validates the user credentials
prepended by the domain name against the LDAP server.
• Authenticated User: The authentication server validates the user credentials against the
LDAP server.
• Prompt at User Interface: Users type their credentials at the control panel.
• System: Login name and password credentials are specified in this field and stored in the
printer. The printer uses the system credentials go log into the file server.
10. Type the Login Name and Password if the system will be directly accessing the file server.
11. Click Save.
HTTP/HTTPS
Before you begin:
• Enable HTTP or Secure HTTP (SSL). Ensure that a certificate is installed on the printer if you are
using SSL.
• Configure your web server, and ensure that HTTP/HTTPS services are running. POST requests and
scanned data will be sent to the server to be processed by a CGI script. Note the IP address or host
name of the web server.
• Create a user account and password for the printer on the Web server. Note the user name and
password.
• Create a home directory for the printer.
• Create a bin directory in the home directory
• Copy an executable CGI script in the bin directory. You can create your own script, or
download a sample script. For details, see CGI Scripts on page 110. Note the path to the
script. The script can be defined with script_name.extension or by
path/script_name.extension.
• Create a folder with read and write permissions on the Web server, or alternate server. Note the
directory path, user name, and password. This is your file repository.
• Test the connection by logging in to the printer’s home directory on the Web server. Send a POST
request and file to the Web server. Check to see if the file is in the repository.


