


13 Scanning Services
134 Xerox CopyCentre/WorkCentre/WorkCentre Pro 123/128 System Administration Guide
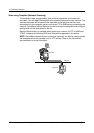
When using Scan to FTP/SMB, Kerberos authentication has the following affect on the
feature:
1. Selects [Scan to FTP/SMB].
2. A login/password popup will be displayed to authenticate users with the Kerberos
server. Enters the login and password.
The login and password is passed on to the Kerberos server and if a match is found
the user is successfully authenticated.
The user needs to enter a valid login and password for the FTP/SMB server. This may
or may not be the user’s Kerberos login/password, rather it is a login/password that is
accepted by the FTP/SMB server.
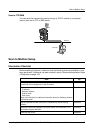
When using Network Scanning, Kerberos authentication has the following affect on
the feature:
1. Selects [Network Scanning].
2. A login/password popup will be displayed to authenticate users with the Kerberos
server. Enter the login and password.
The login and password is passed on to the Kerberos server and if a match is found
the user is successfully authenticated.
Through the templates/repositories, the users will enter a valid login/password for FTP/
SMB servers. This may or may not be the user login/password; rather it is a login/
password that is accepted by the FTP/SMB server.
Public templates are accessible to any user. Private templates require a password that
may or may not be different from the Kerberos password.
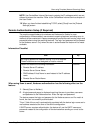
Remote Authentication Network Communication Setup
1.
Connect the machine to the network.
2. Display the [System Settings] screen.
3. Select [Network Settings]
4. Select [Remote Authentication Server Settings]
5. Select [Authentication System], then select [Change Settings] and choose
Kerberos 2000 or Kerberos Solaris.
6. Select [Remote Server Setup], then select [Change Settings] and choose to enter
an IP address or Server Name.
7. Select [Remote Server IP Address], then enter the IP address of the Kerberos
server.
8. Select [Remote Server Name], then enter the name of the server. DNS
information needs to be populated through Internet services.
9. Select [Remote Server Port Number] and enter the port number. The default is
Port 88.