


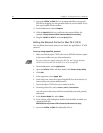


90 Chapter 5– Printing From Your Computer
11. Locate the CX250_V1.PPD file. It is recommended that you copy the
PPD file by dragging it to the specified folder in your local disk. To do
this, open another Finder window.
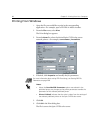
12. From the Go menu, select Computer.
13. Click the MacOSX disk icon, and locate the required folder, for
example:
Library\Printers\PPDs\Contents\Resources\en.lproj.
14. Drag the CX250_V1.PPD file to the en.lproj folder.
Setting the Network Printer for Mac OS X (10.3)
You can define the network printer to use either the AppleTalk or TCP/IP
protocol.
To set up using AppleTalk protocol:
1. Make sure that the Spire CX250 color server PPD file has been copied
to the correct folder on your client workstation.
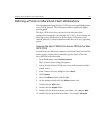
2. From the Go menu, select Applications.
3. Open the Utilities folder and then double-click Printer Setup Utility.
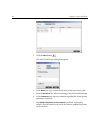
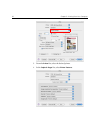
4. Click Add.
5. In the upper box, select Apple Talk.
6. In the lower box, select the required AppleTalk Zone from the list (as
instructed by your system administrator).
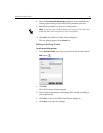
7. Locate the Spire CX250 color server name in the list.
8. From the printers list, select <server_name>_ProcessPrint.
Any jobs sent to this printer will be automatically processed, printed,
and stored.
9. In the Printer Model list, select Other.
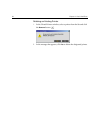
10.
In the Choose a File dialog box, double-click the folder to which you
copied the PPD file:
MACOSX\Library\Printers\PPDs\Contents\Resources\en.lproj.
11. Locate the CX250_V1.PPD file and double-click it.
For more information about copying the PPD file, see Copying the Spire
CX250 Color Server PPD File for Mac OS X (10.3) on page 89.