


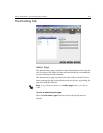
Setting Parameters in the Job Parameters Window 197
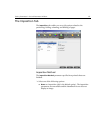
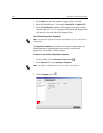
1. In the Marks area, select one of the following options:
a. To print the lines that indicate where the sheet should be cropped,
select the
Crop Marks check box.
• To print the crop marks on both sides of the page, select the
Both sides of sheet check box.
b. To print the lines that indicate where the sheet should be folded,
select the
Fold Marks check box.
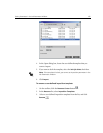
2. In the Bleed area, select one of the following options:
• Maximum bleed: Use this option to extend the bleed to the sheet
fold lines.
• Custom bleed size: Type the desired bleed size in millimeters.
Note:
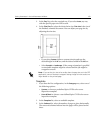
• Crop marks are placed according to the Trim Size option. A minimum
of 6 mm is required for crop marks and 10 mm for fold marks.
• If your job already includes crop marks incorporated by the DTP
application, you do not need to add crop marks here. If you do add crop
marks, both sets of crop marks can be printed.
• If you want to use crop marks incorporated by the DTP application,
make sure that enough space is left around your page in the PostScript
file so that the page prints with crop marks.
Note:
• You cannot extend the bleed size beyond the sheet fold lines. Bleed
does not affect the position of crop marks.
• Bleeding must be defined in your DTP application in order for the Spire
CX250 color server to be able to apply the bleed options.