


120 Chapter 7– Color Workflow
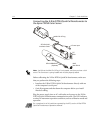
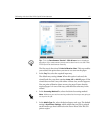
11. While pressing down the button on the X-Rite DTP34 QuickCal
densitometer, align the head with the cyan arrow’s tip. The arrow is to
the left of the cyan column on the Image Density Calibration Curve.
Its tip intersects the semi-dotted line.
12. Sweep the X-Rite DTP34 QuickCal densitometer over the cyan
column.
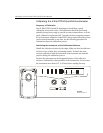
A beep sounds and a green light blinks when the scan is complete. A
check mark appears over the cyan icon and instructions appear for the
next sweep, this time for the magenta column.
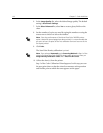
13. After each color sweep, wait for the check mark to appear over the
appropriate icon and follow the instructions as listed.
When all of the separation columns have been successfully scanned, a
check mark appears next to all icons.
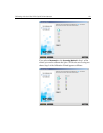
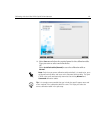
Step 3 of the Color Calibration Wizard appears.
Note: Ensure that the separation columns on the chart are scanned in the
order they appear in the icons: Cyan>Magenta>Yellow>Black.
Notes:
• If at any stage the scanning has not been completed properly, click
Reset and scan again.
• If an error occurs while you are scanning the chart, an alert message
appears. Click OK and re-scan the charts.
• If you selected Automatic as the Screening Method in Step 1 of the
wizard, repeat steps 11-13 for the Text/Line Art chart.