


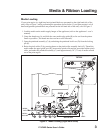
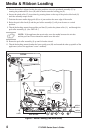

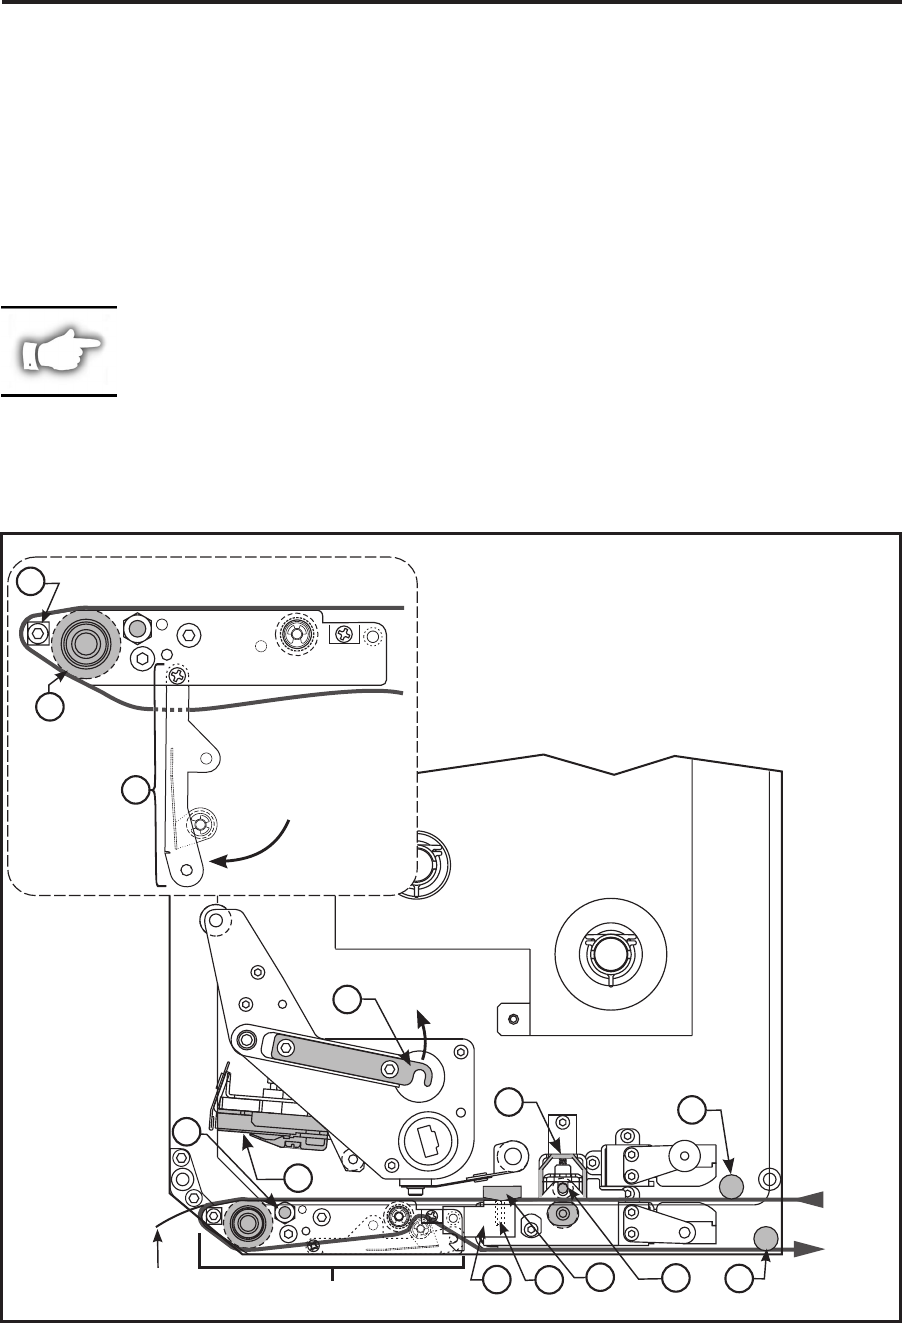
5. Ensure the media is aligned within the print path then close the printhead assembly (C) by
rotating the printhead lock lever (D) until it latches onto the locking pin (E).
6. Secure the pinch roller (F) in position by pressing down on the top of the pinch roller latch (G)
until the assembly snaps closed.
7. Position the outer media edge guide (B) so it just touches the outer edge of the media.
8. Raise the peel roller latch (I) and the peel roller assembly (J) will pivot down to a vertical
position.
9. Thread the backing material around the peel bar (K), under the platen roller (L), and through the
peel roller assembly (J). (See DETAIL.)
NOTE: If the applicator has an air tube, route the media between the air tube
and the peel bar. Do not thread the media over this tube!
10. Rotate the peel roller assembly (J) up until it latches closed.
11. Thread the backing material under the lower guide post (M) and around the take-up spindle of the
applicator (refer to the applicator’s user’s manual).
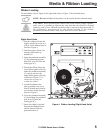
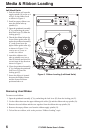
4 170PAX2-Series User’s Guide
Media & Ribbon Loading
OPEN
E
G
H
C
D
MEDIA
PATH
MEDIA
BACKING
LABEL
SEE DETAIL
I
B
A
F
M
OPEN
DETAIL
K
L
J
Figure 3. Media Loading (Left-Hand Units)