Troubleshooting
Power On Self Test
A Power On Self Test (POST) is performed each time the printer is turned ON. During this test, the
front panel lights (LEDs) will turn ON and OFF to ensure proper operation. At the end of this self
test, only the POWER LED will remain lit. Once the Power On Self Test is complete, the media is
advanced to the proper resting position, as determined by the programmed Media Feed setting.
To initiate the Power On Self Test, turn the printer ON using the power switch on the control panel.
The POWER LED will go ON. The other control panel LEDs and the LCD monitor the progress and
indicate the results of the individual tests. All displayed prompts occur in English; however when a
test fails, the prompt will also rotate through the international languages.
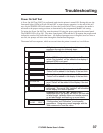
The normal self test sequence, which occurs each time the printer is turned on, is as follows:
1. All lights turn on simultaneously and then turn off in
sequence through the following steps.
2.
SRAM Test
SRAM functionality test performed.
3.
Option ROM Test
Option ROM functionality test performed. The
words “Not Installed” will be added to the display if
optional ROM is not used.
4.
Printhead Test
Printhead is checked for proper operation.
5.
Processor Test
Processor functionality test performed. The word
“Failed” will be added to the display if the test fails.
6.
E-Cubed Test
E-cubed functionality test performed. The word
“Failed” will be added to the display if the test fails.
7.
EEPROM Test
EEPROM/PROM functionality test performed. The
word “Failed” will be added to the display if the test
fails.
8.
Memory Card Test
Optional PCMCIA Memory Card functionality test
performed. The words “Not Installed” will be added
to the display if no card is present.
9. Depending on how the ^MF ( Media Feed)
instruction is set, the printer will feed to the first web
or label length, calibrate ribbon and media sensors,
or set label length and feed one or more labels.
10
.
PRINTER READY
x.x MB VXX.X.X
Printer is ready for operation. Refer to
“Configuration and Calibration” to set specific
parameters. Designate prompt language with the
^KL command or from the menu.
170PAX2-Series User’s Guide 37


