


Ribbon Loading
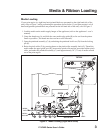
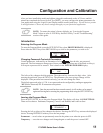
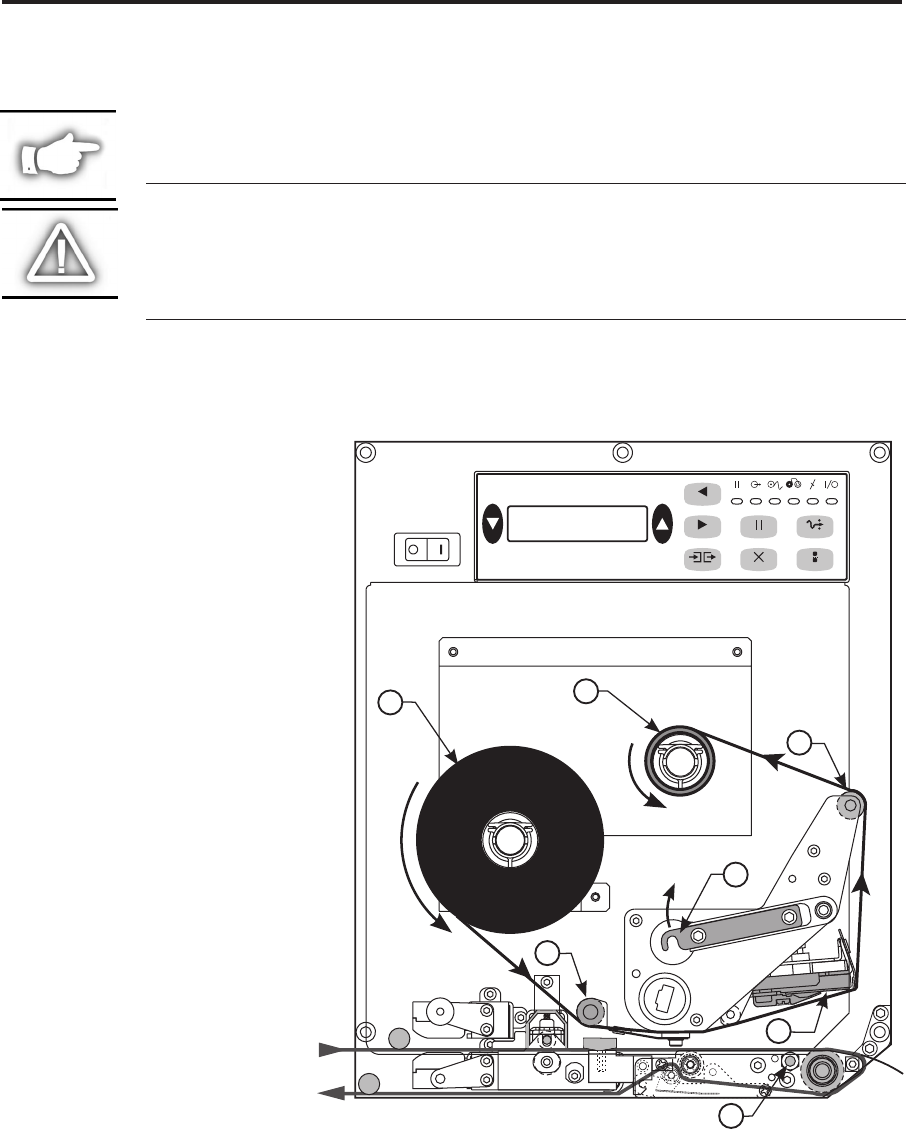
To load ribbon, refer to Figure 4 (for right-hand units) or Figure 5 (for left-hand units).
NOTE: Do not load ribbon if the printer is to be used in the direct thermal mode.
CAUTION: When installing the ribbon roll on the ribbon supply spindle,
make sure it is pushed up against the stop and that the ribbon is aligned
squarely with its core. Do not use ribbon that is narrower than the media. If
the printhead is not protected by the smooth backing of the ribbon,
premature printhead failure may result due to excessive abrasion.
Right Hand Units
1. Push the ribbon roll onto the
supply spindle (N) as far as it
will go, so the ribbon feeds as
shown in Figure 4.
2. Install an empty ribbon core
onto the ribbon take-up
spindle (O).
3. Open the printhead assembly
(C) by unlatching the print-
head lock lever (D) from the
locking pin (E).
4. Thread the ribbon below the
lower ribbon guide roller (P),
under the printhead assembly
(C), and up and over the
upper ribbon guide roller (Q)
as shown in Figure 4. Use
caution not to crease or
wrinkle the ribbon!
5. Attach the ribbon to the
take-up spindle core (use a
label if needed) and wind for
several turns in the direction
shown in Figure 4.
6. Close the printhead assembly
(C) by latching the printhead
lock lever (D) onto the
locking pin (E).
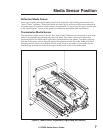
7. Insure the ribbon is located
between the Ribbon Sensor
and the Sensor Reflector
positioned above it.
Media & Ribbon Loading
170PAX2-Series User’s Guide 5
OPEN
CALIBRA
TE
PREVIOUS
NEXT
SETUP/EXIT
PAUSE
CANCEL
FEED
DATA POWERERRORRIBBONMEDIAPAUSE
O
N
E
P
C
D
Q
Figure 4. Ribbon Loading (Right-Hand Units)