3. Physical installation
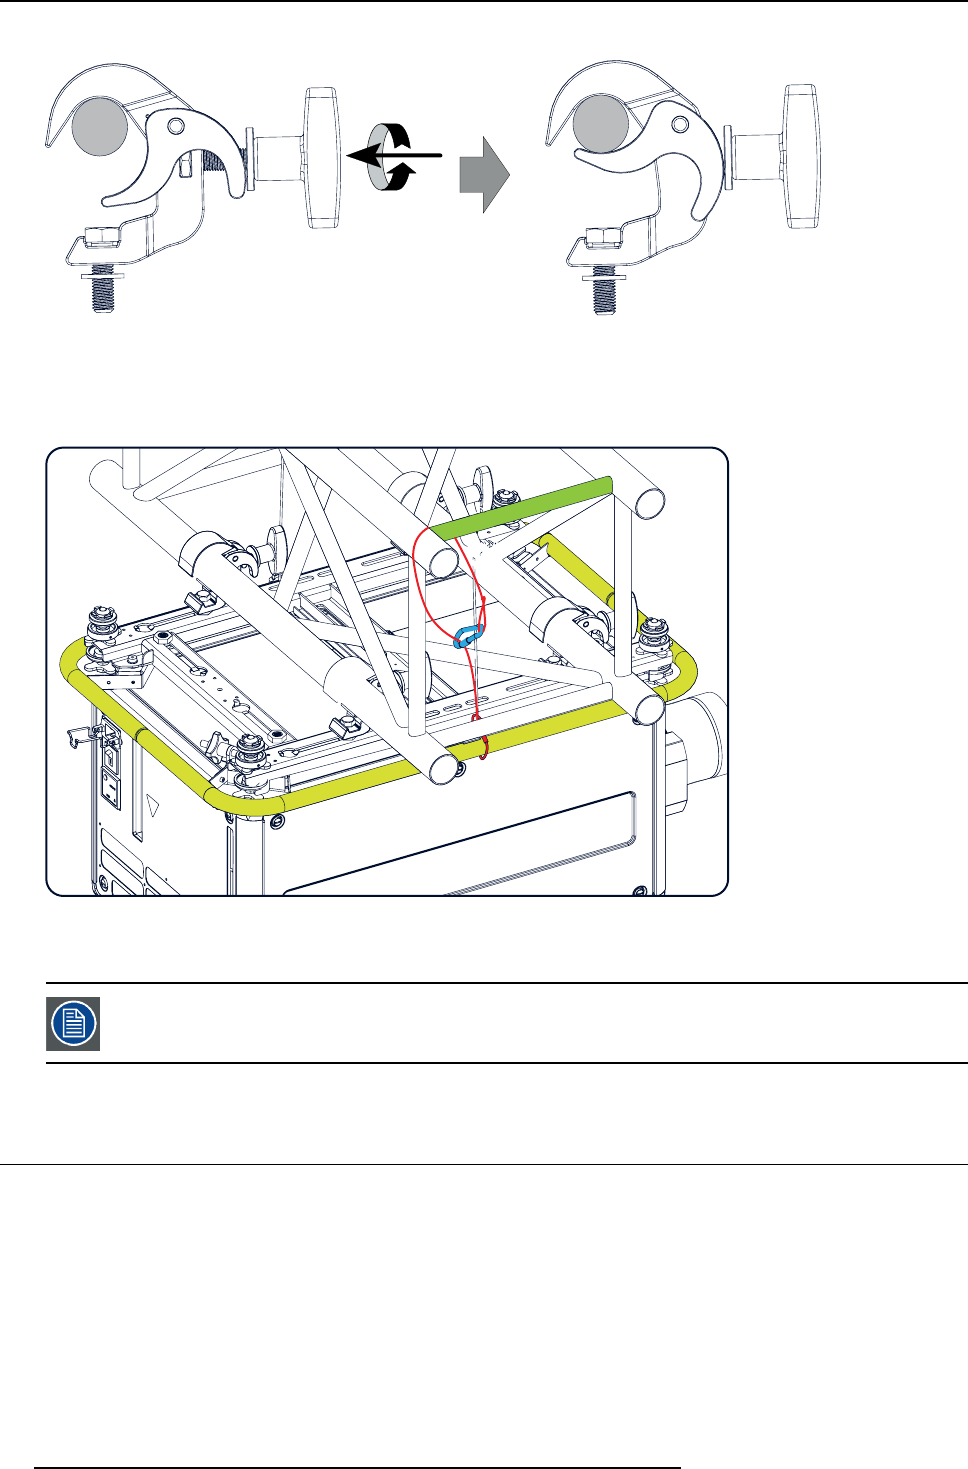
7. Lock all four rigging clamps by turning the fixation handle clockwise.
Image 3-54
Clamp fixation
8. Install the 2 safety cables, one on both sides of the carrying handle, and around the truss.
Mount the 2 safety cables around the carry handle (push the hook through the loop and then aroun
d the truss so that there is not
to much play (maximum 20 cm). If necessary turn the cable a few times around the truss before clasping the safety hook around
the cable.
Image 3-55
Security cables
9. Lift up the truss with the attached projector to the desired height.
Mount the 2 safety cables in such a way that when something goes wrong, the projector cannot fall more than
20 cm. If necessary, turn the cables a few times around the truss to obtain this maximum distance.
3.8 Alignment of a ceiling mounted projector
Necessary tools
17 mm open spanner
Skew adjustment
1. Turn the adjustment knob on the carry handle until the projected hatch pattern is perfectly squared.
44
R5905032 HDX SERIES 02/03/2015


