


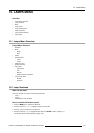
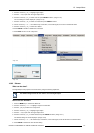


10. Lamps Menu
4. Push the cursor key ↑ or ↓ to highlight Light Output.
5. Push the → key to pull down the Light Output menu.
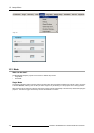
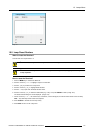
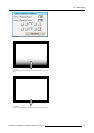
6. Push the cursor key ↑ or ↓ to select CLO and press ENTER to select. (image 10-15)
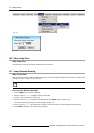
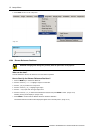
The CLO dialog box will be displayed. (image 10-16)
7. Push the cursor key ↑ or ↓ to select CLO Value and press ENTER to select.
8. Use the cursor key ← or → , the numeric keys on the RCU, or the local keypad, to set CLO to the desired value.
9. Push the cursor key ↑ or ↓ to select CLO Status.
10.Press ENTER to enable or disable the CLO Status.
11.Press BACK to return to the Lamp menu.
Image 10-15
Image 10-16
10.8.3 Dimmer
What can be done?
The Light Output of the projector can be dimmed by using the Dimming adjustment.
The Dimmer Range can be set from 100% to 3% of the Light Output.
How to
set the Dimmer?
1. Press the MENU key to activate the Menu bar.
2. Push the cursor key ← or → to highlight Lamps in the menubar.
3. Push the ↓ key to pull down the Lamps menu.
4. Push the cursor key ↑ or ↓ to highlight Light Output.
5. Push the → key to pull down the Light Output menu.
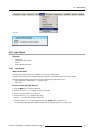
6. Push the
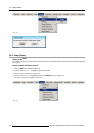
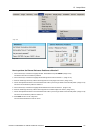
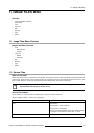
cursor key ↑ or ↓ to select Dimmer and press ENTER to select. (image 10-17)
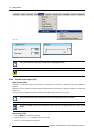
The Dimmer dialog box will be displayed. (image 10-18)
7. Use the cursor key ← or → , the numeric keys on the RCU, or the local keypad, to set the Dimmer to the desired value.
8. Press ENTER to activate the new Dimmer setting.
R5976870 BARCOREALITY SIM 5PLUS/SIM 5R 04/04/2007
177