4-23
FAX-L1000 Chapter 4: Maintenance and Service
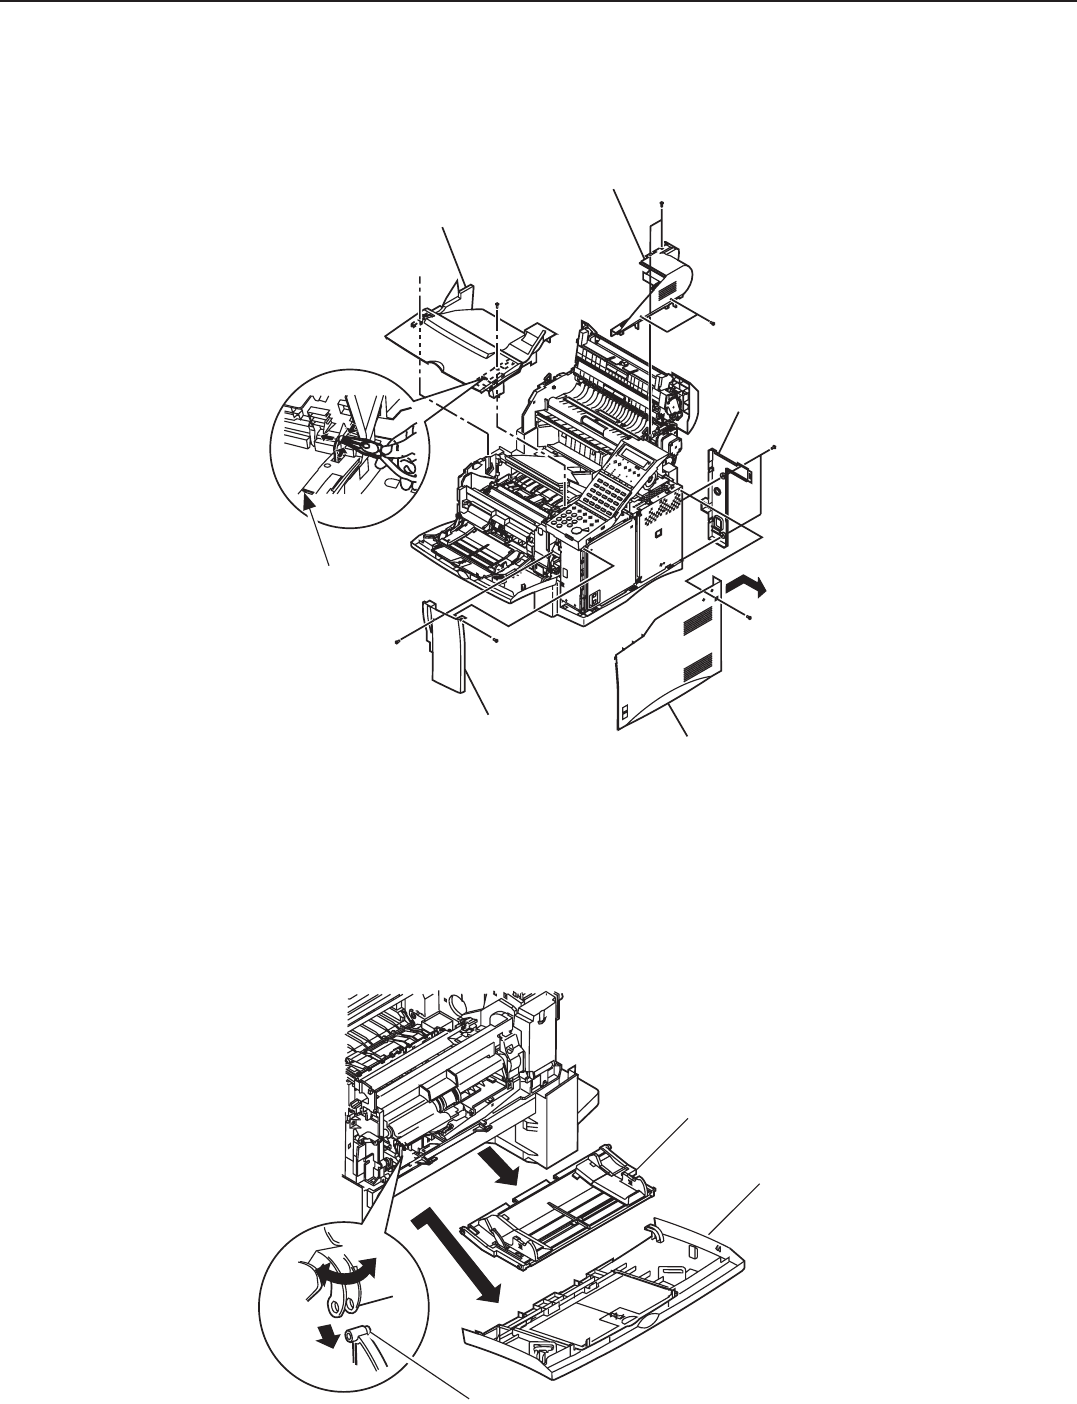
(4) Remove the right cover, front right cover, rear cover and the read motor cover.
(5) Remove the joint of the printer cover using the needle nose prier and release the claw
using the precision slot head screw driver. Then, remove the printer cover.
Figure 4-23 Preparation for Cleaning 3
(6) Remove the claw of the multi-purpose tray.
(7) Separate the multi-purpose tray from the front cover.
(8) Remove the front cover by shifting it to the right.
(9) Remove the multi-purpose tray.
Figure 4-24 Preparation for Cleaning 4
Printer cover
Read motor cover
Rear cover
Front right cover
Right cover
Release the claw inside
using the precision slot
head screw driver.
Multi-purpose tray
Front cover
Claw


