


3-8
Cisco uBR7225VXR Universal Broadband Router Hardware Installation Guide
OL-17309-02
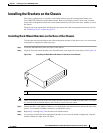
Chapter 3 Installing the Cisco uBR7225VXR Router
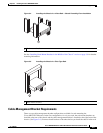
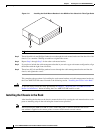
Installing the Brackets on the Chassis
Step 6 Thread two M3 x 6-mm Phillips panhead screws through the cable-management bracket and into the
chassis, and tighten the screws.
This completes the procedure for installing the rack-mount brackets and the cable-management bracket
on the chassis for a rear rack-mount configuration. Proceed to the “Installing the Chassis in the Rack”
section on page 3-10.
Caution To prevent injury, review the safety precautions in Chapter 2, “Preparing the Cisco uBR7225VXR
Router for Installation,” before installing the Cisco uBR7225VXR router in a rack.
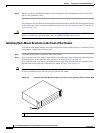
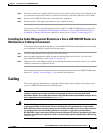
Installing Rack-Mount Brackets on the Front of the Chassis
To install the rack-mount brackets and cable-management bracket on the chassis for a front rack-mount
configuration, complete the following steps:
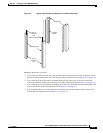
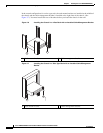
Step 1 Locate the threaded holes in the front sides of the chassis.
Step 2 If you want the front of the chassis flush with the front of the rack, align the first rack-mount bracket to
the threaded holes in the right side of the chassis as shown in Figure 3-9 on page 3-8.
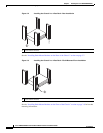
If you want the front of the chassis protruding from the rack, align the first rack-mount bracket to the
threaded holes in the right side of the chassis as shown in Figure 3-10 on page 3-9.
Note There are five holes in each of the rack-mount brackets for the Cisco uBR7225VXR. Four holes are used
for front and middle mount, and five holes are used for rear mount.
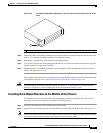
Figure 3-9 Installing the Rack-Mount Brackets so the Front of the Chassis Is Flush with the Rack
1
Rack-mount bracket
271666
1