


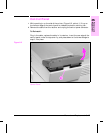


Back Cover
Note
The metal back cover and the plastic panel at the right rear are removed as
a single unit.
The square opening at the upper rear corner on the right side plastic panel
is the engine test access.
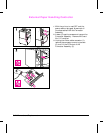
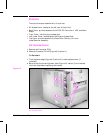
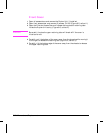
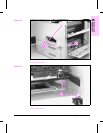
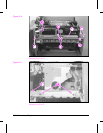
1 Remove (5) screws, CH102 (Figure 6-4, callout 1).
2 Open the top cover door and remove (1) screw, CH102 (Figure 6-4, callout 2)
3 Open the 2000-Sheet Input Unit transfer door (if installed), Tray 1, and the
Right Lower Door Assembly.
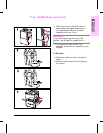
4 Remove (2) screws, CH102 (Figure 6-4, callout 3), from plastic panel to the
left of the metal back cover.
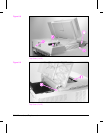
5 Carefully release the cover around the AC input connector (Figure 6-4,
callout 4) at the lower right of the back cover and slide the right side of the
cover slightly forward.
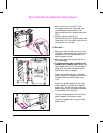
6 Carefully release the retaining tabs (Figure 6-4, callout 5) on the plastic
panel to the left of the metal back cover by gently pulling the cover to the
left while moving both pieces away from the printer chassis.
Back Cover
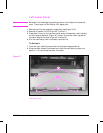
Figure 6-4
6
Removal and
Replacement
Removal and Replacement 6-19