


Stapling Bed Assembly
1 Remove the Stapling Unit Assembly (see Figure 6-91).
2 Remove the Back Plate (see Figure 6-92).
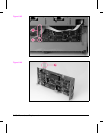
3 Remove the Stapler Unit Controller PCA (see Figure 6-94).
4 Remove the Top Cover Assembly (see Figure 6-97).
5 Remove the wire frame by pushing both arms of the wire frame toward the
center to clear the retaining notches and lift.
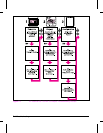
6 Release the brushes bar from the retaining notches and lift upwards.
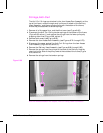
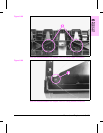
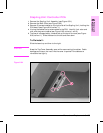
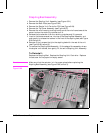
7 Insert a flat-blade screwdriver into top of the Stapling Bed Assembly and
push gently to release the latches in the front of the stapling bed (see Figure
6-98. callout 2).
8 Remove (3) torx screws that join the stapling bed with the rest of the unit
(see Figure 6-98, callout 3).
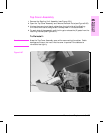
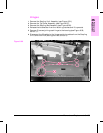
9 To remove the Stapling Bed Assembly, lift the edge of the assembly where
the stapler unit resides, then gently lift the entire Stapling Unit Assembly.
To Reinstall:
Replace the Stapling Bed. Replace the Stapling Unit Controller. Replace
the actuator for the paper bin empty sensor.
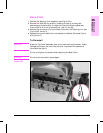
Caution
Make sure that the actuator is in its proper place before replacing the
Stapling Bed Assembly (see Figure 6-99, callout 3).
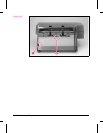
Figure 6-98
6-108 Removal and Replacement