


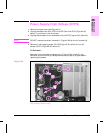
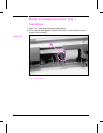

Sensor, Paper Input Unit (PS2)
1 Remove the following components in the order listed:
• Toner Cartridge
• Trays 2 and 3
• Transfer Roller (see Figure 6-51)
• Registration Assembly (see Figure 6-43)
• Front Cover (see Figure 6-5)
• Tray 1 Assembly (see Figure 6-52)
• Right Lower Door Assembly (see Figure 6-14)
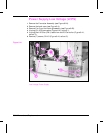
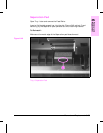
Note
The sensor retaining tabs are released from above, and the sensor is
removed and replaced from below.
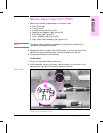
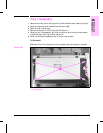
2 Release the retaining tabs (Figure 6-48, callout 1) on the right end of the
sensor and rotate the sensor down to free the tabs on the left end.
3 Unplug the connector from the sensor.
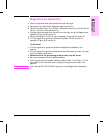
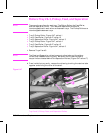
To Reinstall:
1 Plug in the connector before reinstalling.
2 Hold the sensor flag out of the way, hook the tabs on the left end in first,
and snap the right end of the sensor upward into place.
Paper Input Unit Sensor (PS2)
Figure 6-48
6
Removal and
Replacement
Removal and Replacement 6-61