


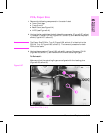


PCA, DC Controller
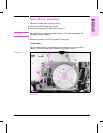
1 Remove the Formatter Assembly (see Figure 6-24).
2 Remove the back cover (see Figure 6-4).
3 Remove the High Voltage Power Supply (see Figure 6-40).
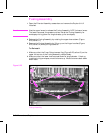
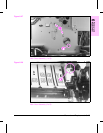
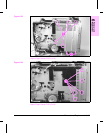
4 Unplug (18) connectors from the PCA (Figure 6-32, callout 1).
Note: For the 5Si HM (C3124A), you also need to disconnect the Thermal
Control Cable (Figure 6-32, callout 6).
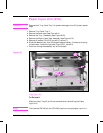
5 Remove (2) screws, CH101 (Figure 6-32, callout 2), from the left side of the
PCA, and (2) self-tapping screws, CH106 (Figure 6-32, callout 3) from the
right side of the PCA.
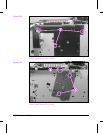
6 Release two retaining clips (Figure 6-32, callout 4) and carefully tip the left
side of the PCA outward to clear the Formatter PCA connector from the
card cage.
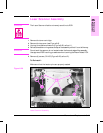
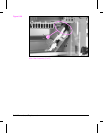
To Reinstall:
Make sure the retaining clip posts (Figure 6-32, callout 4) and the two
locator pins (Figure 6-32, callout 5) are properly aligned.
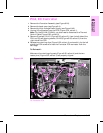
DC Controller PCA
Figure 6-32
6
Removal and
Replacement
Removal and Replacement 6-47