


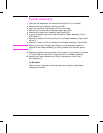
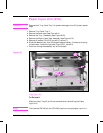

Main Gear Assembly
1 Remove the following components in the order listed:
• Toner Cartridge
• Tray 1
• Tray 2
• Transfer Roller Assembly (see Figure 6-51)
• Back Cover Assembly (see Figure 6-4)
• Tray 1 Assembly (see Figure 6-52)
• Right Lower Door Assembly (see Figure 6-14)
• Paper Input Unit (see Figure 6-31)
• HVPS (see Figure 6-40)
• Main Motor (see Figure 6-30)
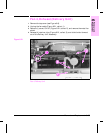
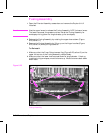
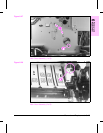
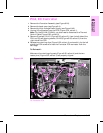
2 Remove (2) screws, CH102 (Figure 6-27, callout 1).
Caution
Be careful not to damage the plastic gears when removing the Main Gear
Assembly.
Note
A slight gentle rocking motion will help free the Main Gear Assembly from
the printer.
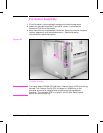
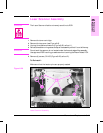
3 From inside of the PIU cavity, carefully tilt the bottom of the Main Gear
Assembly away from the chassis and down to free the gear mechanisms.
To Reinstall:
Note
A slight gentle rocking motion will help install the Main Gear Assembly as
it is rotated into place.
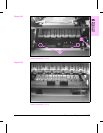
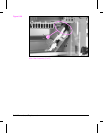
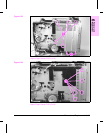
1 Observe the gear assembly position from inside the toner cartridge cavity
(Figure 6-28, callout 2).
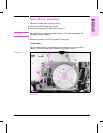
2 First, tilt the top of the assembly inward and insert the upper back part of
the assembly in place (Figure 6-29, callout 3).
3 Continue rotating the assembly upwards into place.
4 Make sure that the locating pins are properly aligned and that the gear
assembly fits tightly against the chassis before replacing the screws (Figure
6-27, callout 4).
6-42 Removal and Replacement