


Message Error
Log
Category/
Message
Description Recommended
Action
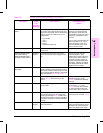
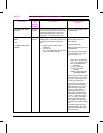
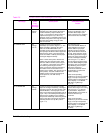
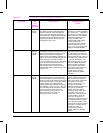
13.x PAPER JAM
(Continued)
13.0
13.1
13.2
13.3
13.4
13.5
13.6
13.0n.00
13.0n.01
13.0n.02
13.0n.03
13.0n.04
13.0n.05
13.0n.06
Printer Engine Specific Paper Jams
0 = Non Specific paper jam.
1 = PAPER FEED 1 PAPER LATE JAM
(Paper late arriving at PS2)
2 = PAPER FEED 2 PAPER LATE JAM
(Paper late arriving at PS1 )
3 = FUSER OUTPUT PAPER LATE JAM
(Paper late arriving at PS1403)
4 = FUSER OUTPUT PAPER STOPPED
JAM
5 = FACE DOWN OUTPUT PAPER LATE
JAM
6 = FACE DOWN OUTPUT PAPER
STOPPED JAM
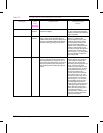
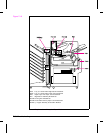
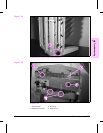
PS2 is located in the Paper
Pickup Unit (refer to Figure 7-16).
Inspect paper path. Verify flag
movement by manually inserting
sheet of paper into slot beneath
right side paper path access door
and listening for flag movement.
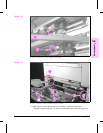
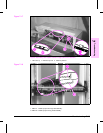
PS1 is the Registration
photosensor (refer to Figure
7-15). Remove the toner
cartridge and lift up on green
lever to access sensor flag.
Verify flag movement.
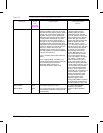
PS1403 is located in the Fusing
Assembly (refer to Figure 7-16).
Remove Toner Cartridge and the
Fuser Access Door and inspect
paper path. Verify photosensor
flag in the Fusing Assembly
moves freely.
PS1402, the face-down delivery
photosensor is located on the
Face-Down Delivery assembly
(refer to Figure 7-15). Inspect
Diverter Drive Assembly, located
on the access door to the Fusing
Assembly and the Face Down
Delivery Assembly. Verify paper
path from the Fusing Assembly to
the top Face Down Bin is clear
and all sensor flags move freely.
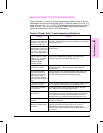
Table 7-5 Printer Control Panel Messages (continued)
7
Troubleshooting
Troubleshooting 7-39