


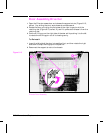


Feeder Assembly
1 Open the left access door and remove the Duplex Unit (if installed).
2 Remove the Fuser Assembly (see Figure 6-25).
3 Open the Top Cover and remove the Toner Cartridge.
4 Remove the Transfer Roller Assembly (see Figure 6-51).
5 Remove the Registration Assembly (see Figure 6-42).
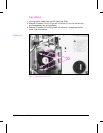
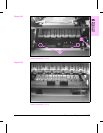
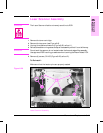
6 Unplug the sensor cable at the right side of the Feeder Assembly (Figure
6-22, callout 1).
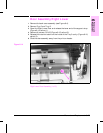
7 Remove (2) screws, CH102 at the front of the Feeder Assembly (Figure 6-22,
callout 2).
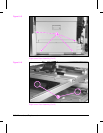
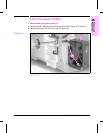
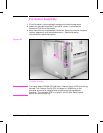
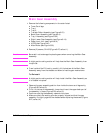
8 Remove (1) screw, CH101 at the back of the Feeder Assembly (Figure 6-23).
Note
Removing the High Voltage Power Supply is recommended to ease the
removal of the Feeder Assembly, primarily because of the contact points.
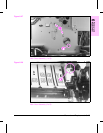
9 Release (4) plastic retaining tabs by moving them in the directions indicated
in Figure 6-23 while carefully lifting upwards on the Feeder Assembly.
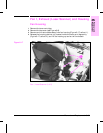
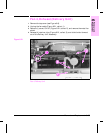
10 Remove the Feeder Assembly by lifting it upwards out of the Toner
Cartridge cavity.
To Reinstall:
Make sure that the plastic retaining tabs are all properly seated before
replacing the screws.
6-36 Removal and Replacement